Start HereLast updated: 2024-05-24
To search anything on this page, use "Control+f" on PC or "Command+f" if you are using a MAC.
Openspace.Social was built from the ground up. This means that the community itself has had the biggest impact in shaping the platform and it's set of features. While many of the features are similar to other platforms, you will find that there are some proprietary aspects of Openspace which make it unique.
Home Screen
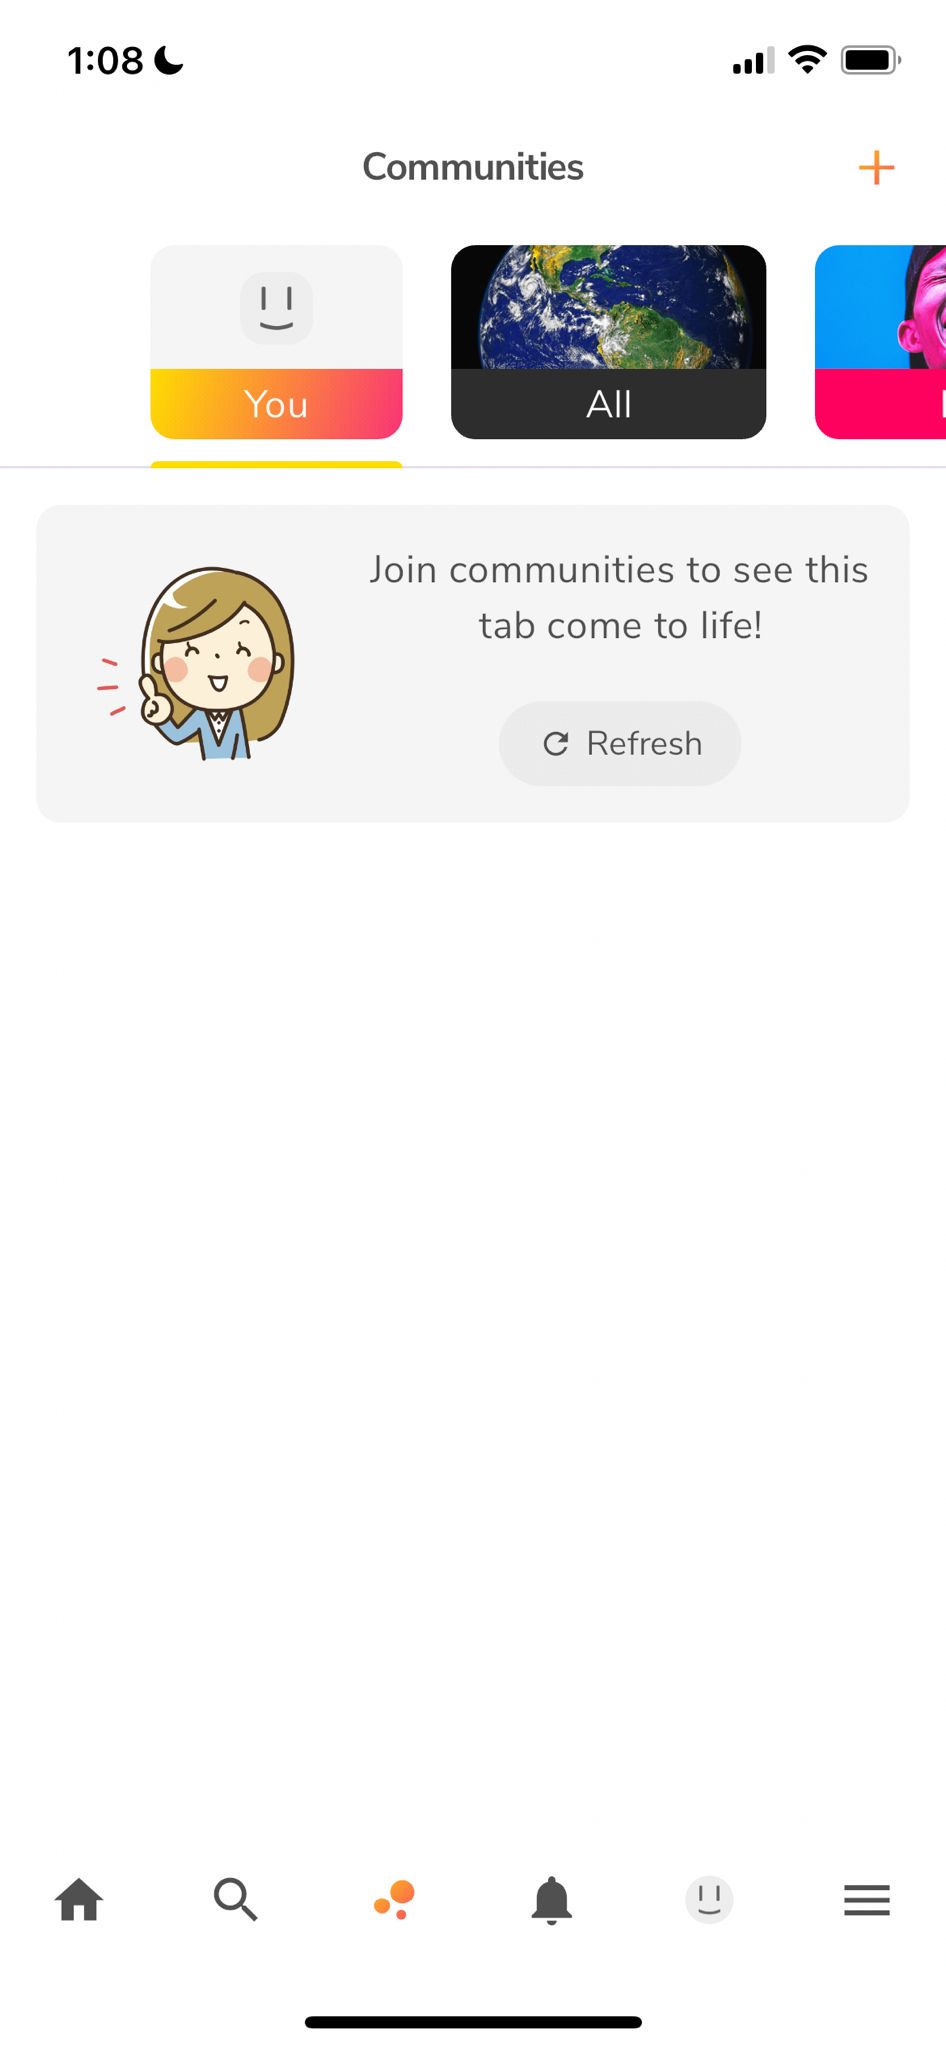
Upon logging into Openspace.Social, the Home Screen serves as your main dashboard. If you haven't joined any communities at sign-up, you’ll see an image indicating there’s nothing to load (as shown below). This can happen for a few reasons: you haven't followed any accounts, joined any communities, created any communities, or posted anything on the platform.
To start filling your feed with content you will want to explore these individual aspects:
How to Post
As mentioned above, click on the "+" icon to start a post. Openspace.Social supports up to 5000 characters (approximately 750 to 1250 words). We are working on expanding this to 7500 characters with support for embedded images. File upload size is capped at 75Mb. Watch the video below or read the instructions to the right of the video to start sharing your content.
- Click the "+" icon on the bottom right of the screen
- Type your message that you want to share.
- If you wish to upload a picture, you can select the "MEDIA" icon at the bottom of the post screen. Alternatively, you can take a direct photo by tapping on "Camera" on the mobile application.
- The next screen shows you sharable options.
World
makes your post available to everyone under your privacy level. Public profiles allow everyone to view the post on your profile, while private profiles only allow your followers to view the content you're sharing. More on this under Profile Options.Connections
makes your post available only to those that you are connected with. Although this might sound like your followers, a connect is different than a follower. More on this underProfile Options.
Circles
makes your post available only to those that you have placed within a circle. This differs from aConnection
in that it allows you to segregate followers without needing to be connected.Community
makes your post available only to those that are within a given community. Public communities can be browsed by accounts outside of the community, but only community members can post to a specific community.- Finally, you can click the
Share
button on the top left of the screen to share it on the platform.
- Click the "+" icon on the bottom right of the screen
- Type your message that you want to share.
- If you wish to upload a picture, you can select the "MEDIA" icon at the bottom of the post screen.
- The next screen shows you sharable options.
World
makes your post available to everyone under your privacy level. Public profiles allow everyone to view the post on your profile, while private profiles only allow your followers to view the content you're sharing. More on ths underProfile Options.
Connections
makes your post available only to those that you are connected with. Although this might sound like your followers, a connect is different than a follower. More on this underProfile Options.
Circles
makes your post available only to those that you have placed within a circle. This differs from aConnection
in that it allows you to segregate followers without needing to be connected.Community
makes your post available only to those that are within a given community. Public communities can be browsed by accounts outside of the community, but only community members can post to a specific community.- Finally, you can click the
Share
button on the top left of the screen to share it on the platform.
Communities
Communities are the heart of Openspace.Social. This is where users can really meet and interact with other platform users based on a common interest. There are a few things to know about Communities, so lets dive right in!
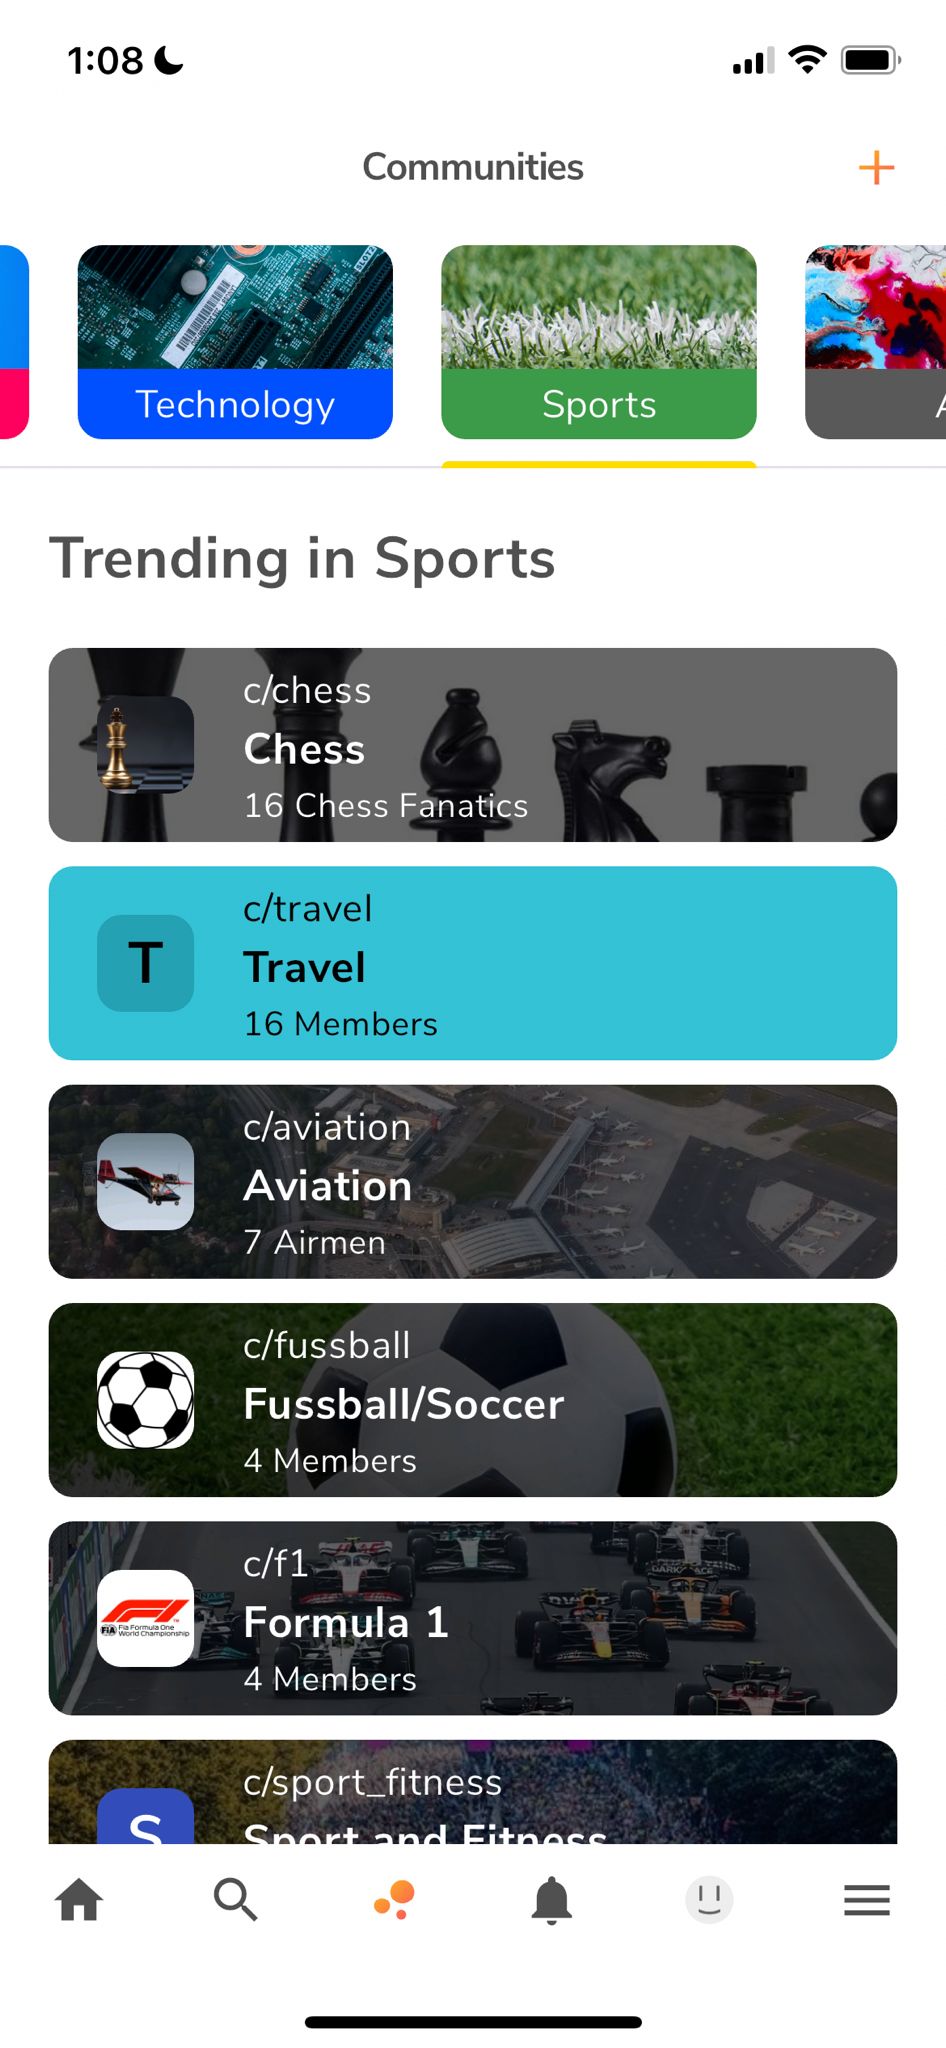
- Find communities based on categories. The top portion of the screen is a banner that slides to the left. In doing so, the app reveals more community categories. When you select a specific category such as "Sports", the app will reveal trending communities in that category. Selecting the "All" Category will display a list of all the available communities.
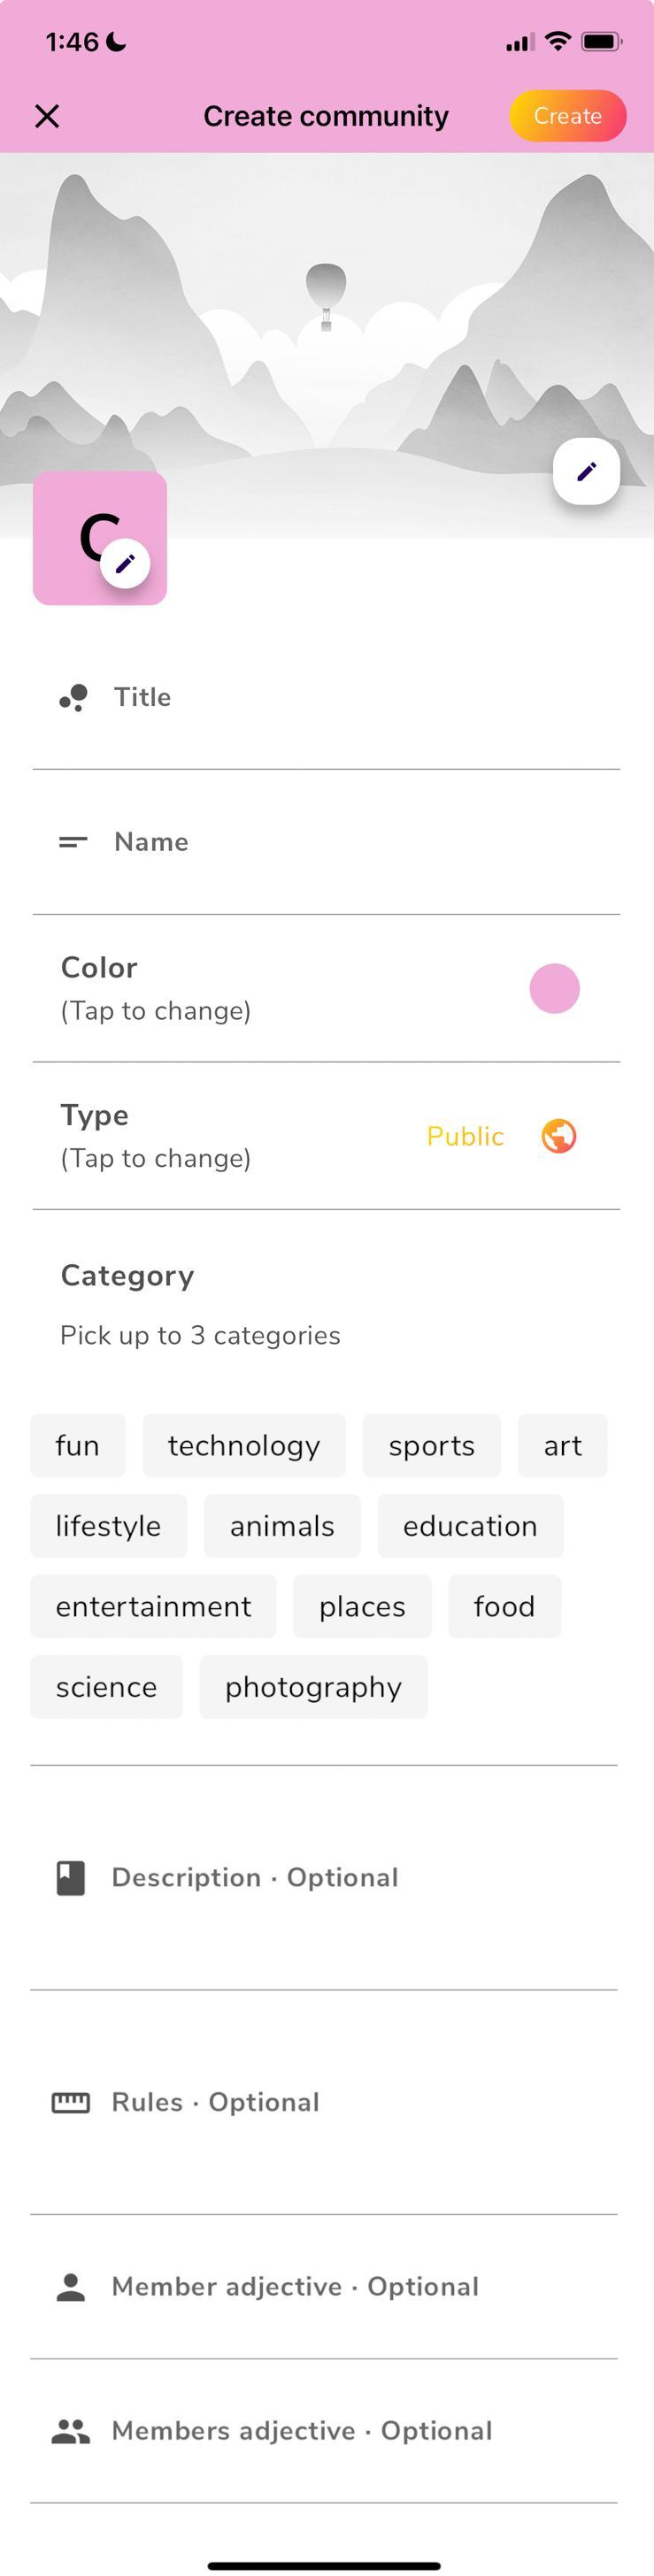
Create community form explained
Top section:
Mandatory Field. Displays generic backdrop of a grey scale image as well as a standard "C" as the profile photo. Banner and Profile images can be modified by tapping on the icon.Title:
Mandatory Field. The title which labels your community.Name:
Mandatory Field. The name which will is searchable and taggable. The community name will be displayed using the "c/" naming convention throughout the platform. i.e. c/chess.Color:
Mandatory Field. A specific color theme for the community can be selected it here. Otherwise, you can keep the default color (default color is randomized and you will get a different color every time you open the "Create community" form.Type:
Mandatory Field. The choice of public and private communities is availble. For the sake of privacy, a private community cannot be made public ever, however a public community can choose to be private (this change is irreversible).Category:
Mandatory Field. You can choose up to 3 categories to place your community in. For example a Soccer community might use the tags: fun / sports / entertainment. This will place your community in the proper category that can allow users to find it through the banner of the "Communities" area.Description:
Optional Field. This tells other members what the community is about. The more descriptive the better!.Rules:
Optional Field. Stipulations that the creator makes in order to keep interactions positive and on topic.Member Adjective:
Optional Field. A name to refer to individual community members. For example a community for food (c/food) might use the word "Foodies".Members Adjective:
Optional Field. A name to refer to your community members as a whole. For example a community for food (c/food) might use the word "Chefs"
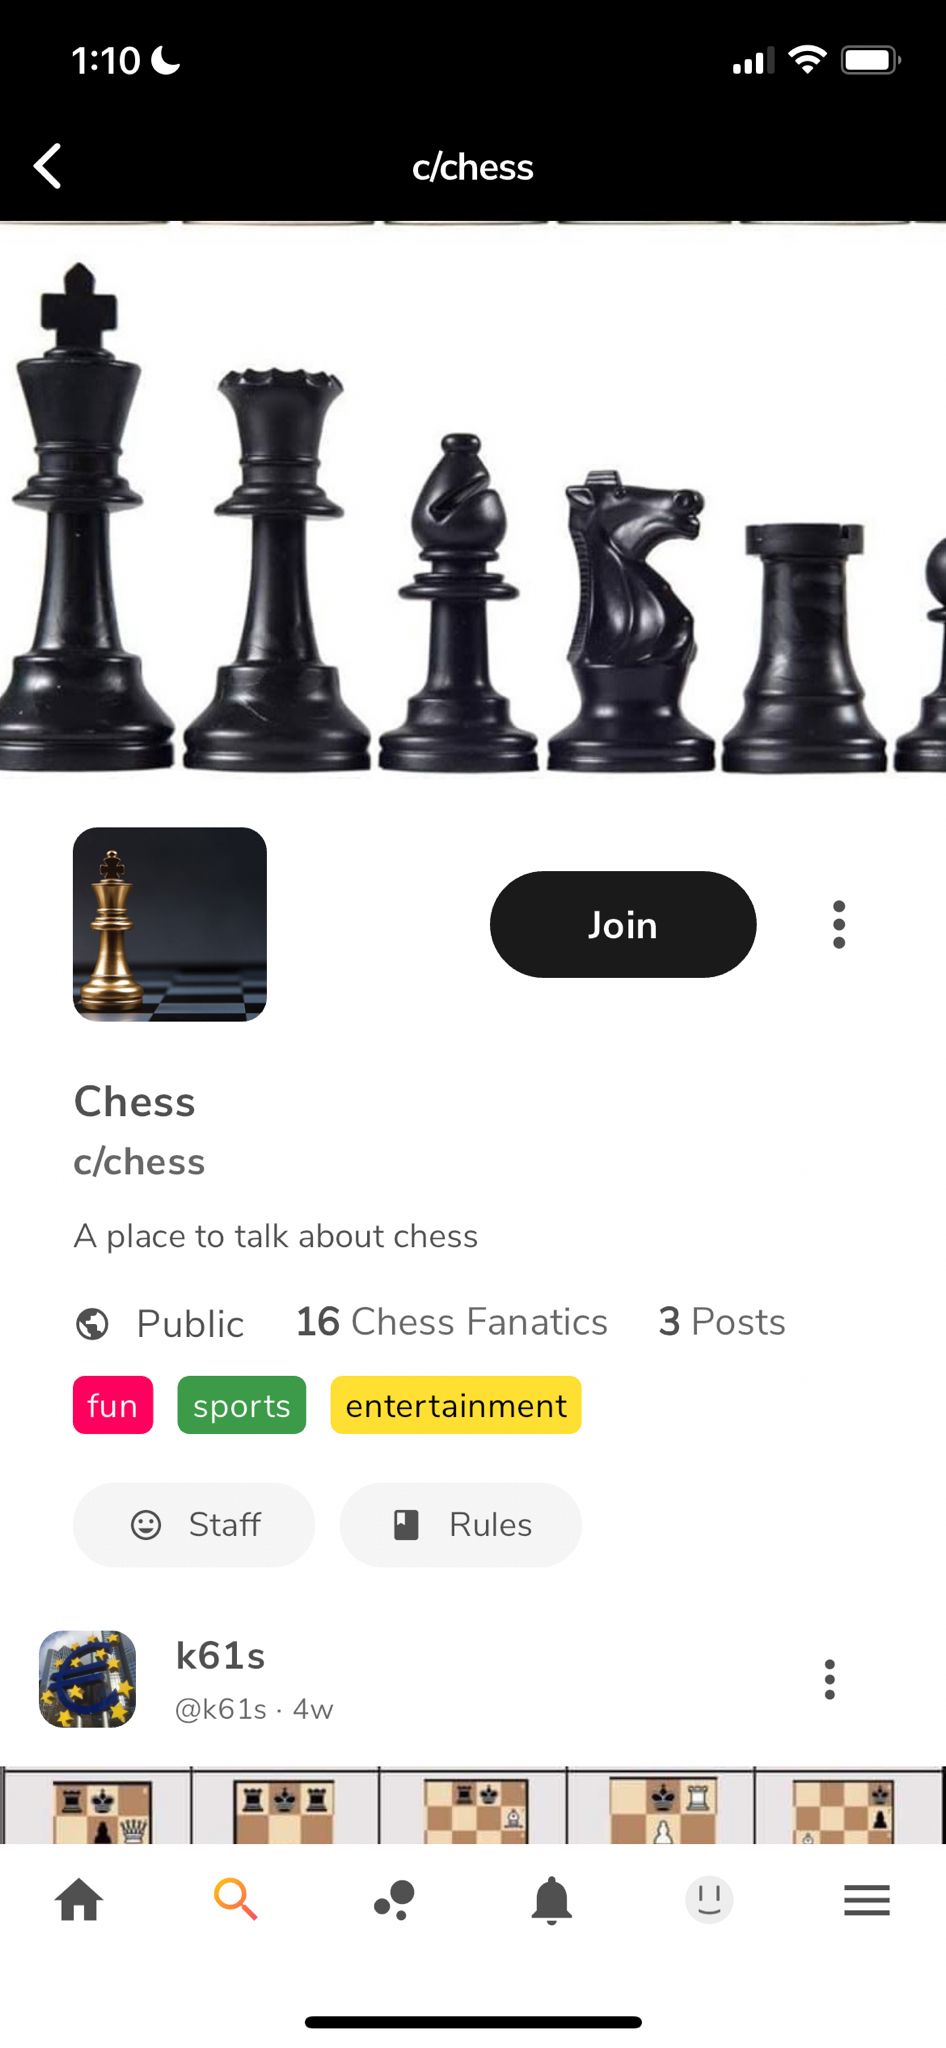
This is the community page. By navigating to a particular community page, you can see all the posts that have been made to that community. You can also see a button to join a community, view the staff members of the community by clicking on "Staff" and review the rules by clicking on "Rules"
Next to the "Join" button, you can see a " " icon. Clicking it will display the following options:
Report Community
- If a community is violating the platform guidelines or conducting illegal activities, it is the job of every Openspace member to report it. It keeps the platform safe and easy to use.Favourite Community
- By making a community a favourite, you can view it in your "favourites" list in the Community area.
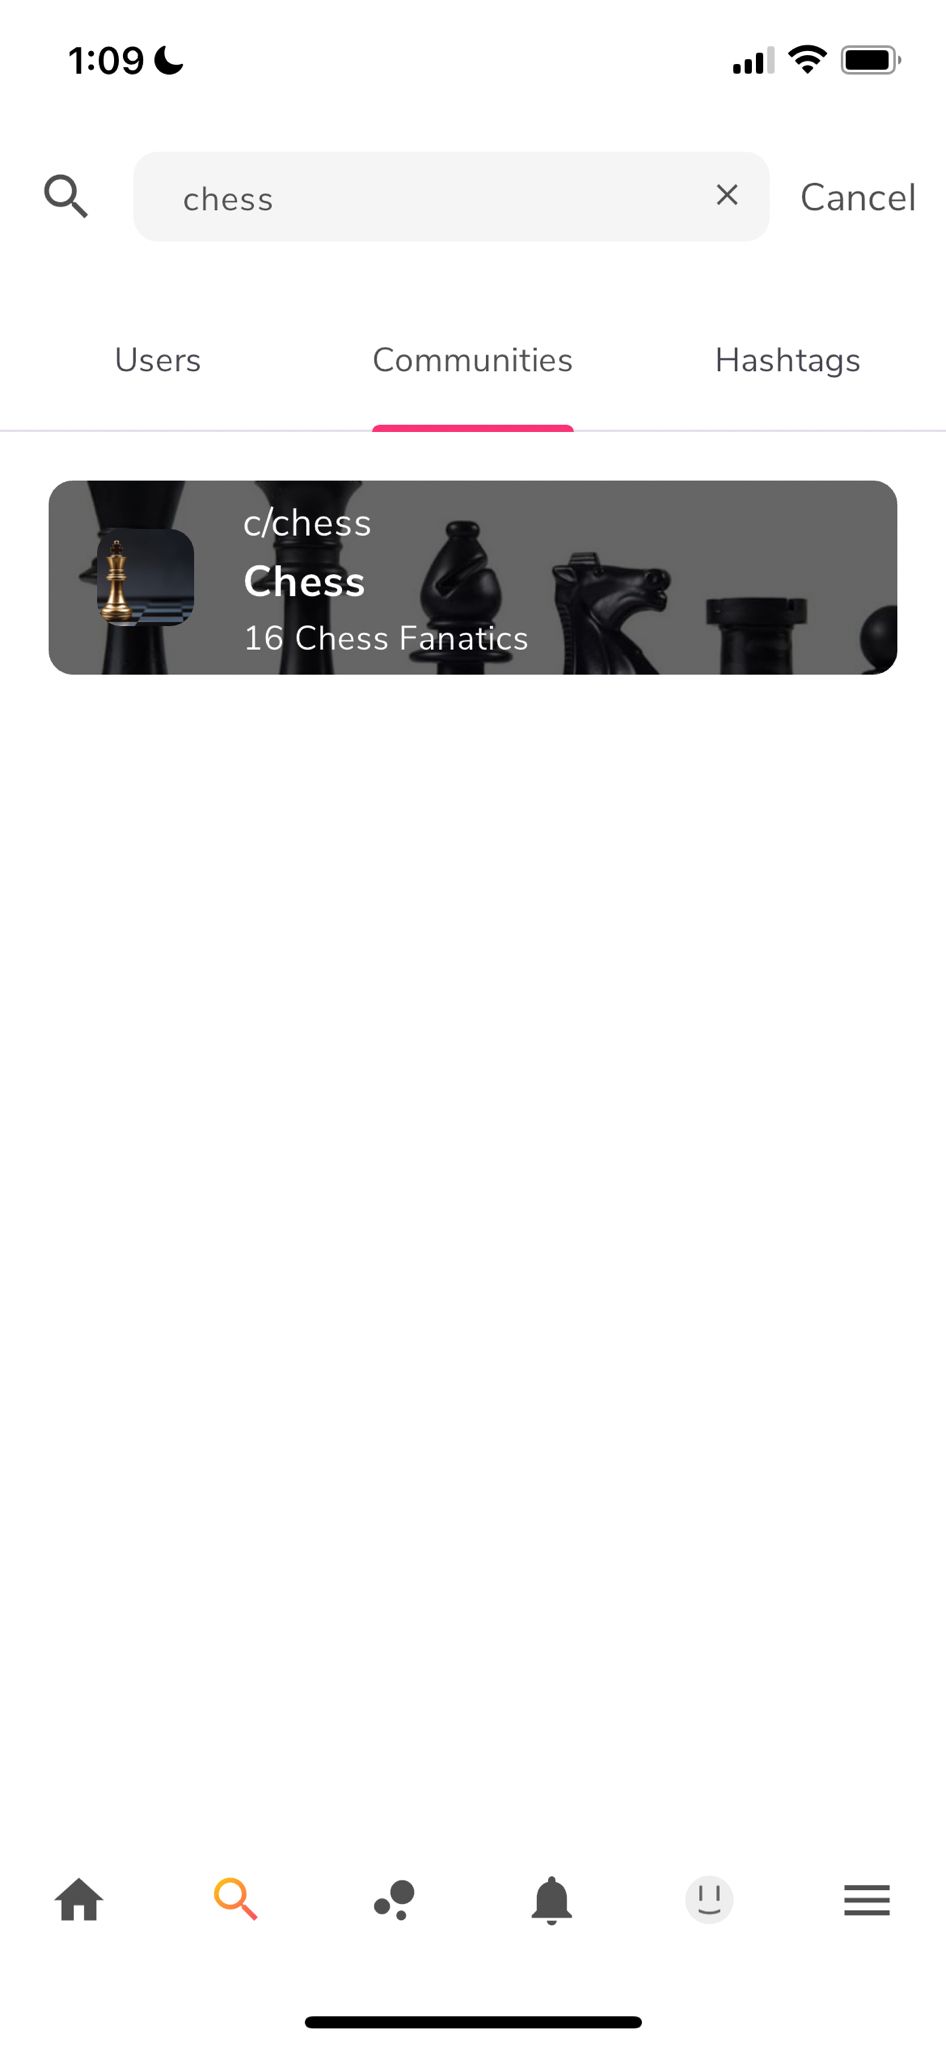
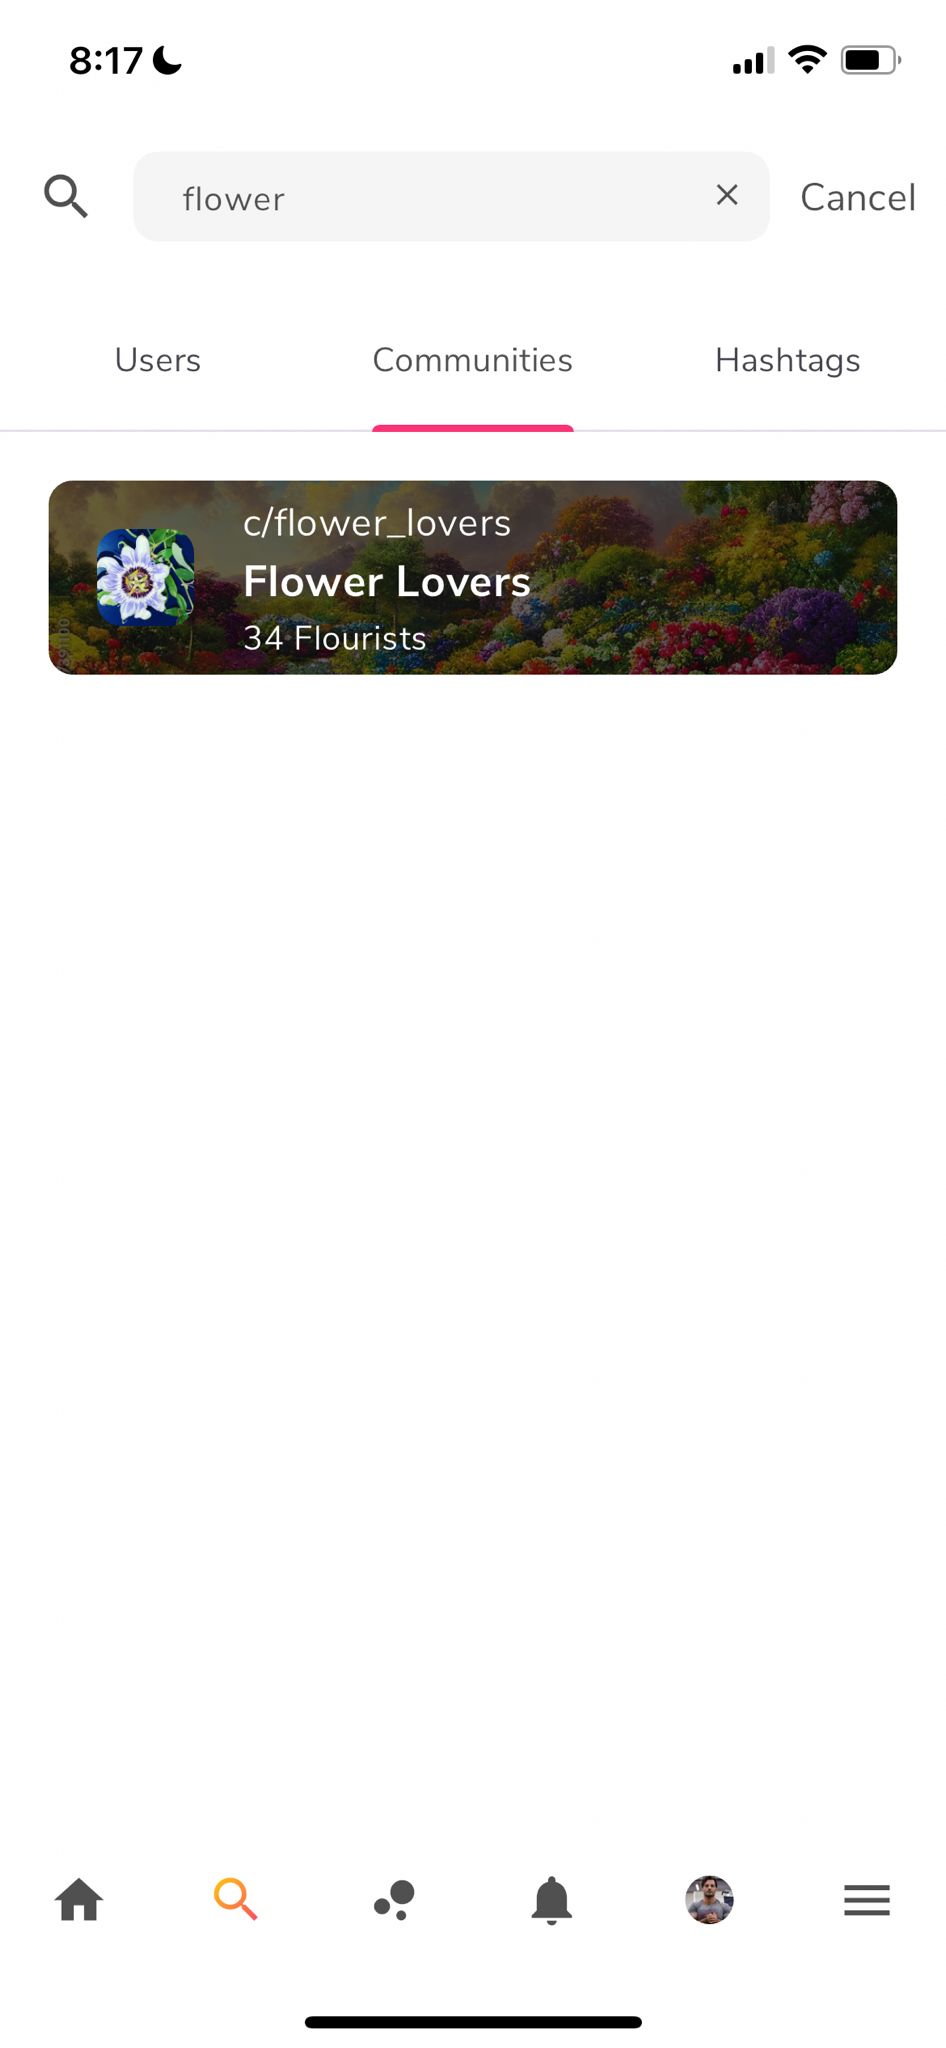
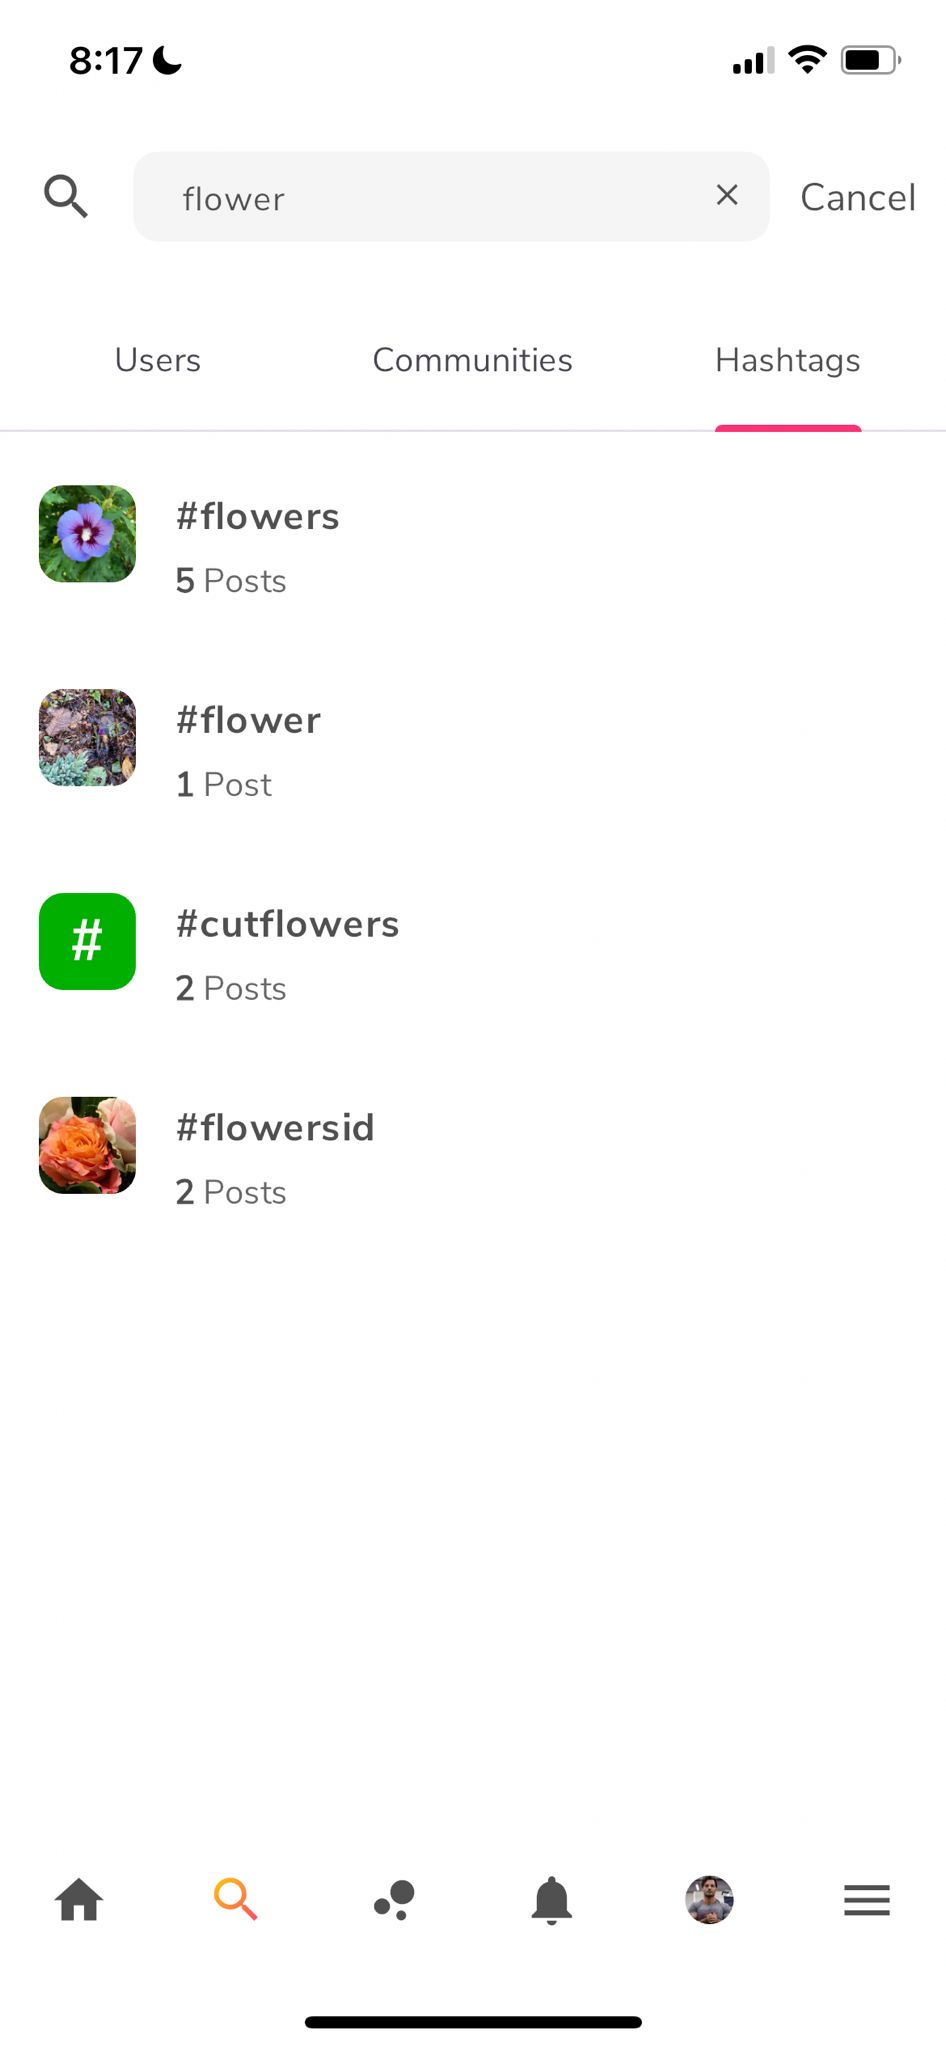
Clicking on the icon on the dashboard allows you to search for members, communities or hashtags. By tapping "communities" under the search bar you tell the platform that you want to search for communities. Once that is selected you can type in a keyword in the search bar and you will see that the results will display in a list below.
View the image to the left for clarity.
Moderation
Moderation is our mechanism for keeping Openspace.Social a friendly and supportive environment. There are options surrounding Moderation that you'll want to keep in mind in case you encounter suspicious material.
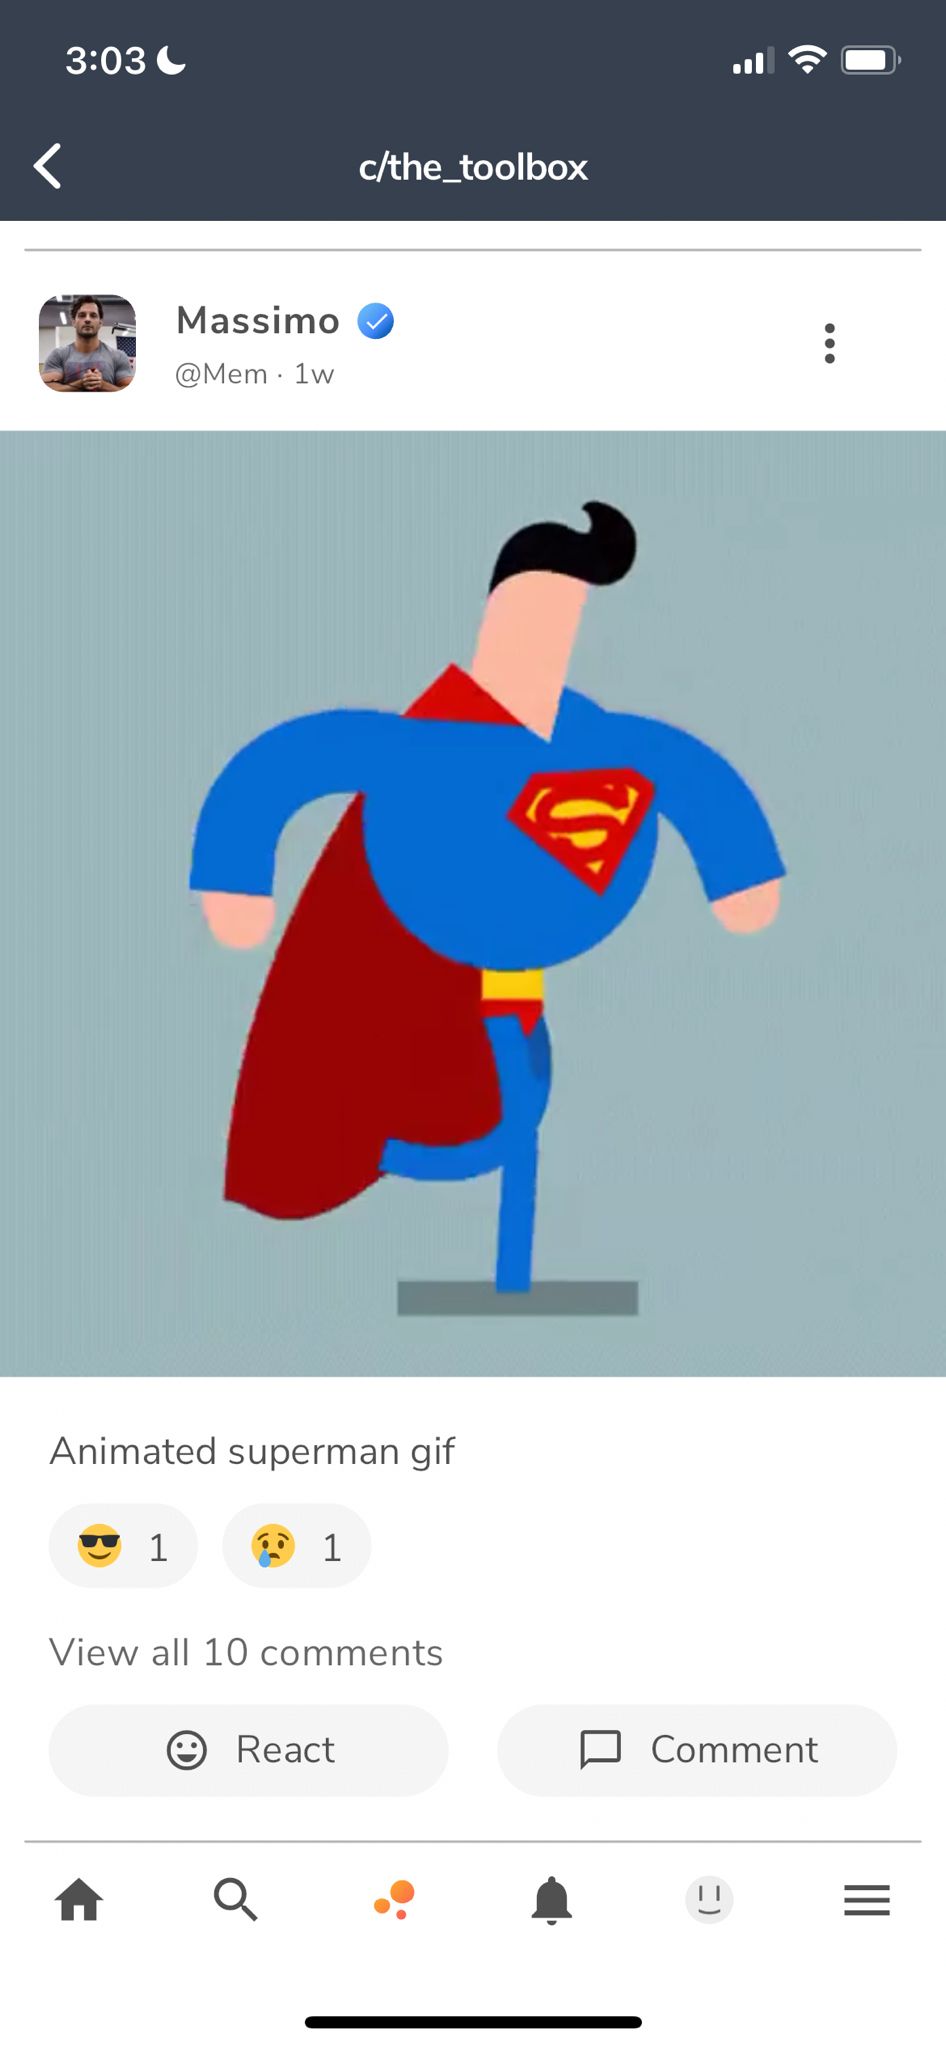
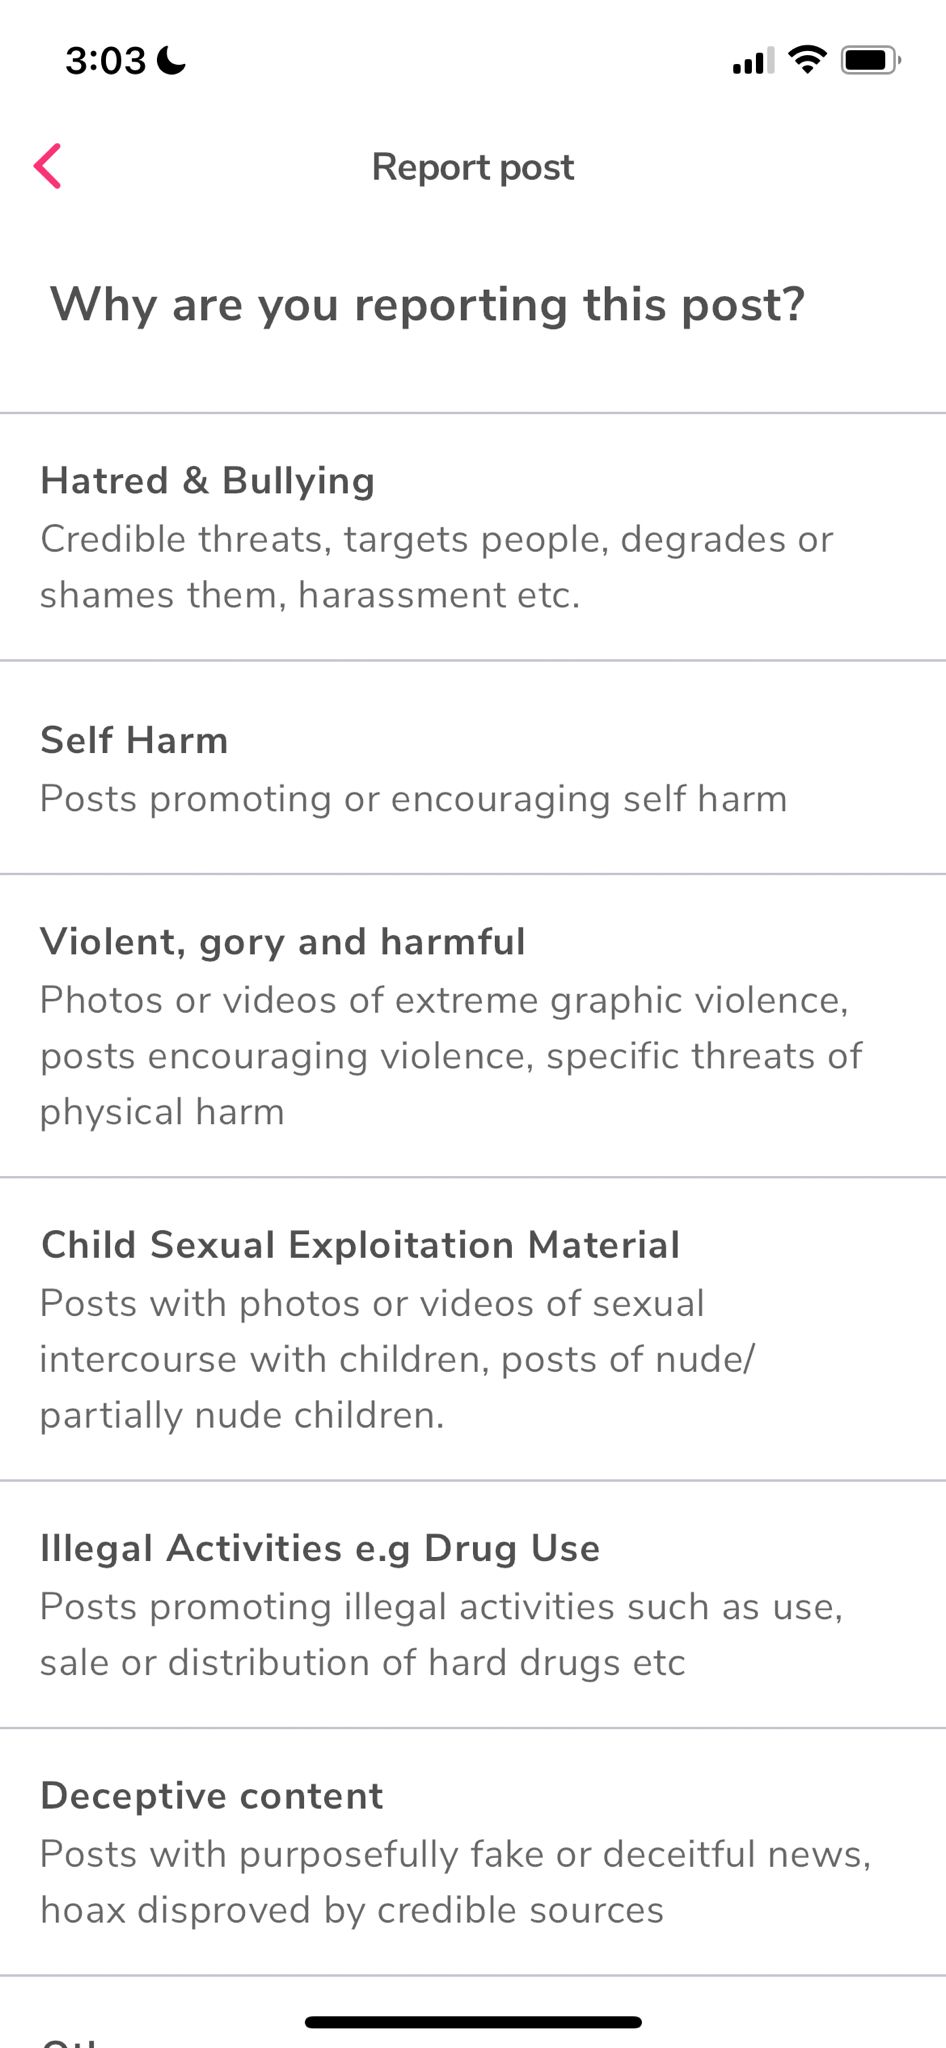
Clicking on the " " icon at the top of a post or the " " next to a comment, will display a menu with options on what to classify the report as (shown below). Once one of the options is selected, it will take you to another screen where you can add additional detail and submit the issue to a moderator.
Once a report has been made, a case is opened which notifies the moderators of the activity to investigate further. If you have any questions or follow-up concerns you can Contact Us directly.
@Tagging
The '@' symbol, commonly referred to as the "at" symbol, is used in various ways on social media platforms to tag or mention other users, making interactions more direct and engaging. Here’s how you can use it effectively on Openspace.Social:
Mentions:
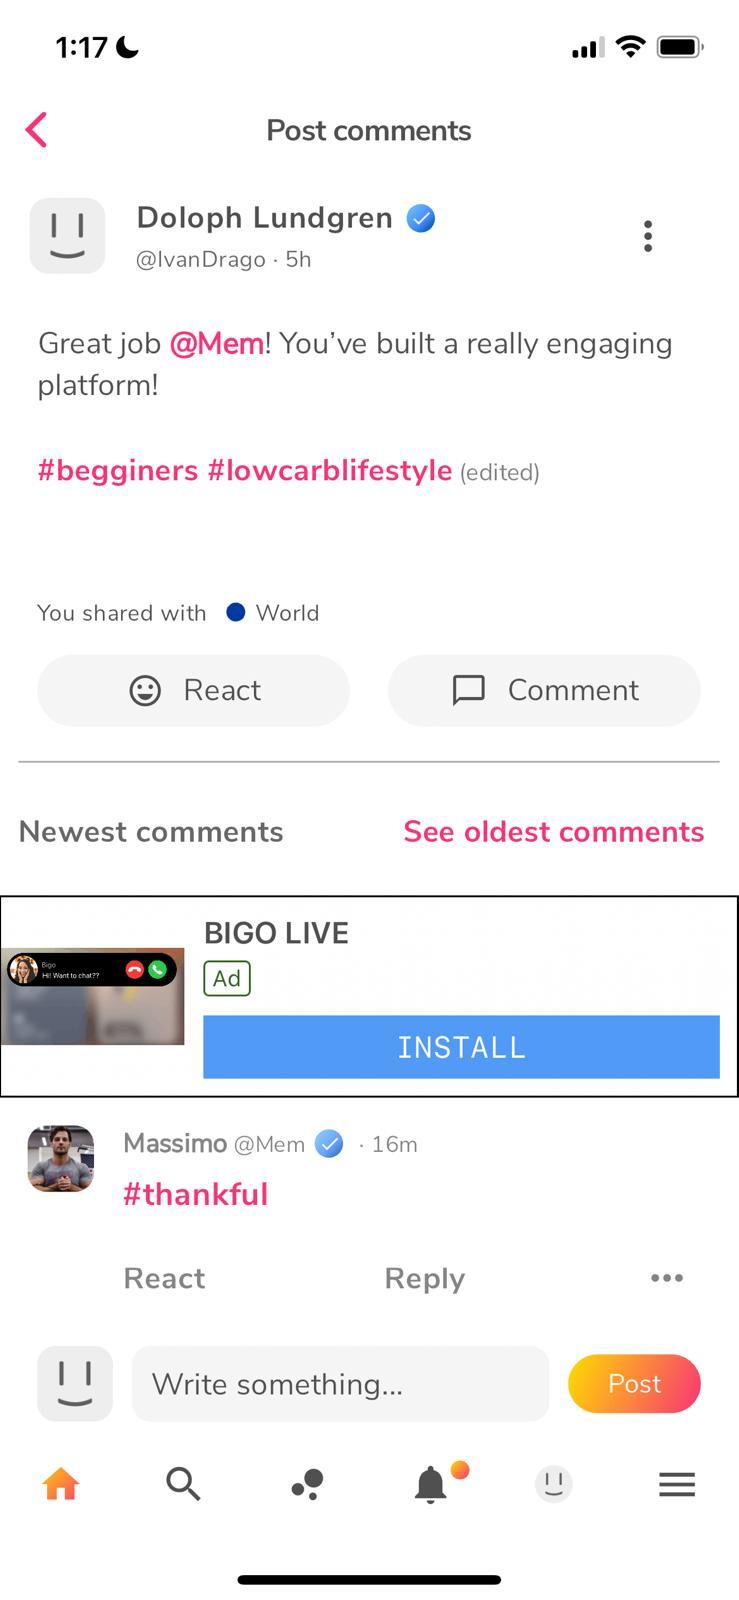
Typing @username in a post or reply will notify the user and link to their profile. For example, posting "Great job, @mem!" will notify the @mem account.Replies:
When you reply to a post, Openspace.Social does not automatically add @username of the person you are replying to at the beginning of your reply because they will be notified via post notifications that there is a reply. So if you want to be specific, remember to include the '@username' in your comment reply.

c/community_linking
On Openspace.Social, the ‘c/’ prefix is used to link to specific communities. A community place within Openspace.Social that is dedicated to a particular topic. Here's how to use ‘c/’ and what it’s for:
Using ‘c/’ to Link Communities
Identify the Community:
Determine the exact name of the Community you want to link to.Type the Community Name:
In your post or comment, type c/ followed by the community name. For example, to link to the Community about cats, you would type ‘c/cats’.Post Your Comment or Submission:
When you post or comment, Openspace.Social will automatically create a hyperlink to the specified Community.
Example
If you want to refer someone to the community for Python programming, you would write:
"You can find more information on this topic at c/Python."
When you share this as a post or comment, "c/Python" will become a clickable link that takes members directly to the Python community.
Purpose of c/
Navigation:
It helps users navigate directly to the community you're referring to without needing to search for it manually.Sharing:
It allows you to easily share and promote communities relevant to the discussion.Context:
It provides context by linking directly to a community where a topic is discussed in detail.
Additional Tips
Check Community Names:
Ensure you have the correct community name. Misspelling it will lead to a non-existent or incorrect community.No Spaces or Special Characters:
Community names do not have spaces or special characters. For example, c/catsanddogs instead of c/cats and dogs.Using in Titles:
You can also use c/ in the titles of your posts to indicate relevance or direction towards a specific community.
Linking Multiple Communities
You can link to multiple communities in one comment or post. For example:
"You can find more information on this topic at c/Python."
Each of these will become a clickable link to the respective community. By using c/, you can enhance your posts and comments by providing direct links to relevant communities, making your contributions more helpful and connected.
#Hashtags
Hashtags are used to categorize content and make it more discoverable to users who are interested in specific topics. Here's how hashtags work and how to use them effectively on Openspace.Social:
How Hashtags Work
Discoverability:
Hashtags turn topics and phrases into clickable links in your posts, which lead to a page that aggregates all posts tagged with that specific hashtag.Search:
Users can search for hashtags to find content related to a specific topic.Reach:
Using popular and relevant hashtags can increase the visibility of your posts beyond your followers, reaching a broader audience.Engagement:
Posts with hashtags often see higher engagement because they attract users who are specifically interested in those topics.
How to use Hashtags on Posts and Comments
- When creating a new Post, you can simply type in your hashtag as displayed in the picture. #beginners
- When replying to a Post, you can also just type the hashtag as part of your comment. #thankful
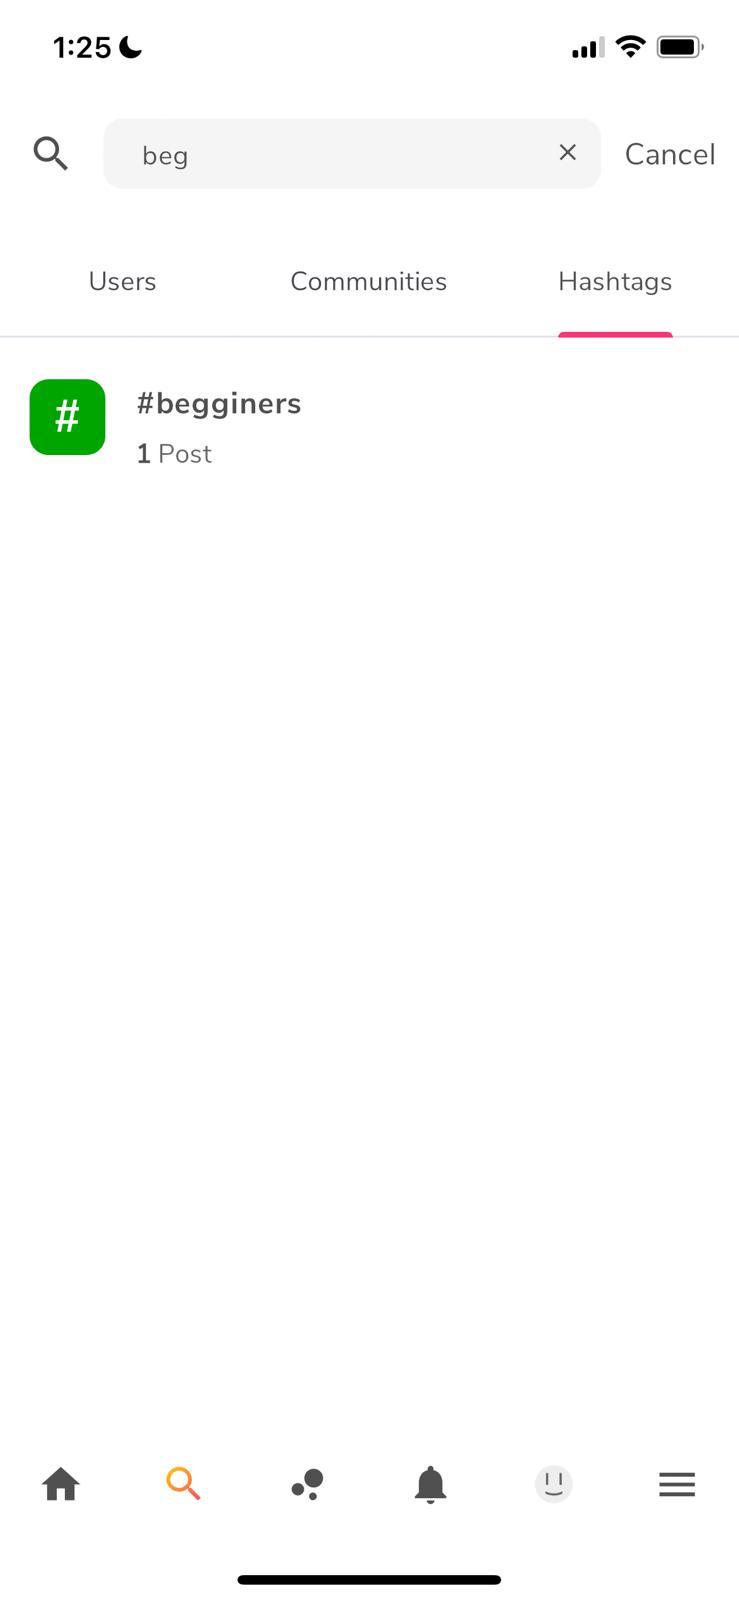
How to search Hashtags throughout the entire platform
- Click on the search icon " " and start typing a key word. The UI will display "Users / Communities / Hashtags" along with the search results.
- You can tap on "Hashtags" for the system to display results for your search as they pertain to Hashtags.
Best Practices for Using Hashtags
- Relevance: Use hashtags that are relevant to the content of your post. Irrelevant hashtags can be seen as spammy and may reduce engagement.
- Popularity: Mix popular hashtags with less popular, niche ones. Popular hashtags can give you more exposure, but your post might get lost quickly. Niche hashtags can help you reach a more targeted audience.
- Quantity: Openspace allows up to 10 hashtags per post. While you don’t need to use all 10, using a good number of relevant hashtags can increase your reach.
- Variety: Use a variety of hashtags to reach different segments of your audience. Avoid using the same set of hashtags for every post.
- Research: Look at what hashtags influencers and competitors in your niche are using. This can give you ideas for which hashtags might work well for you.
- Engagement: Engage with posts under the hashtags you use. Like, comment, and follow users who post under those hashtags to build a community and increase your visibility.
Emojis
Emojis on platforms like Openspace.Social are used to add personality, emotion, and visual appeal to your content. They are also used to react to posts and comments. Here’s how to use emojis effectively on Openspace.Social:
Best Practices for Using Emojis
- Relevance: Use emojis that are relevant to the content. Random or excessive use of emojis can be confusing or distracting.
- Moderation: Don’t overdo it. Too many emojis can make your post look cluttered and unprofessional. Aim for a balanced and tasteful use.
- Consistency: Use a consistent set of emojis that align with your brand or personal style. This helps create a recognizable theme or identity.
- Engagement: Use emojis to encourage engagement. For example, using the pointing finger emoji 👉 can draw attention to a link or call to action.
- Accessibility: Consider the accessibility of your posts. Overuse of emojis or using them in place of words can make it difficult for screen readers to interpret your content.
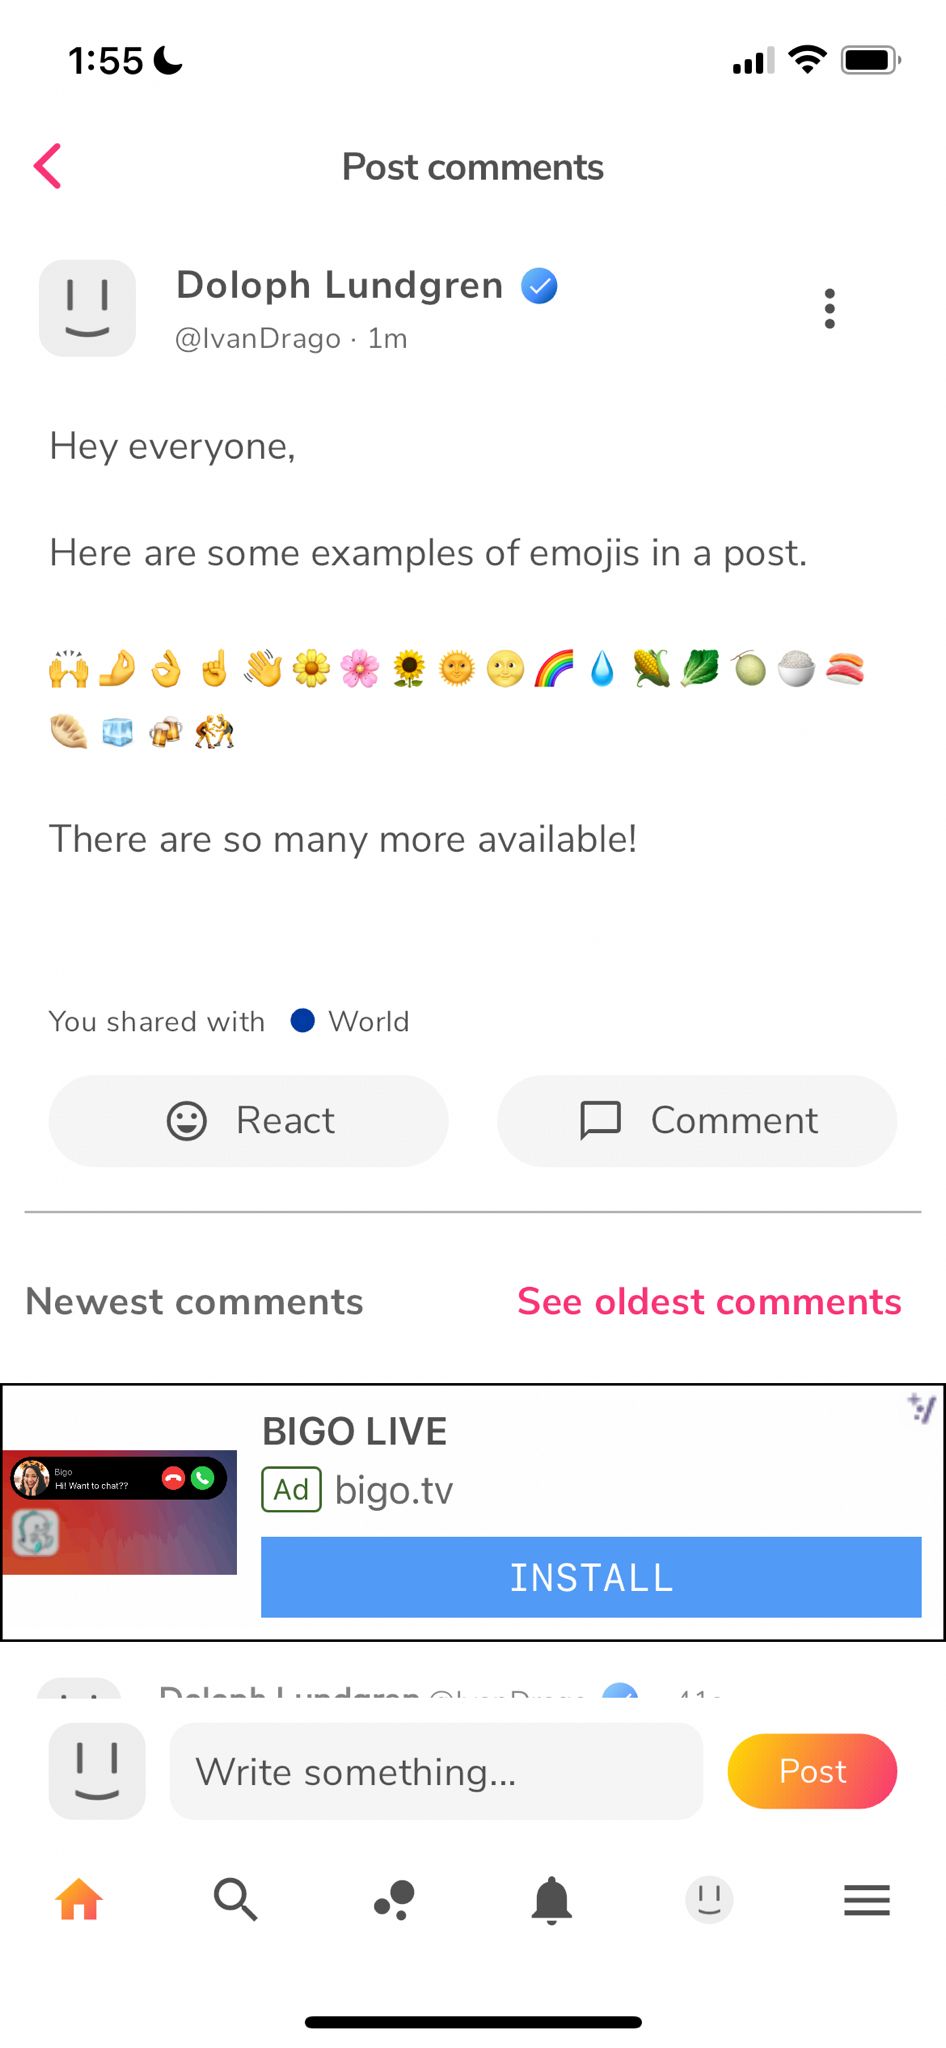
How to use Emojis on Posts
- When creating a new Post using a mobile device, you can insert any pictographic emojis that are part of your mobile device keyboard.
- When creating a new Post using the web application, you can copy emojis from sites like Emojipedia and paste them into your Openspace.Social posts or comments.
How to use Emojis on Comments
- When creating a new Post using a mobile device, you can insert any pictographic emojis that are part of your mobile device keyboard.
- When creating a new Post using the web application, you can copy emojis from sites like Emojipedia and paste them into your Openspace.Social posts or comments.
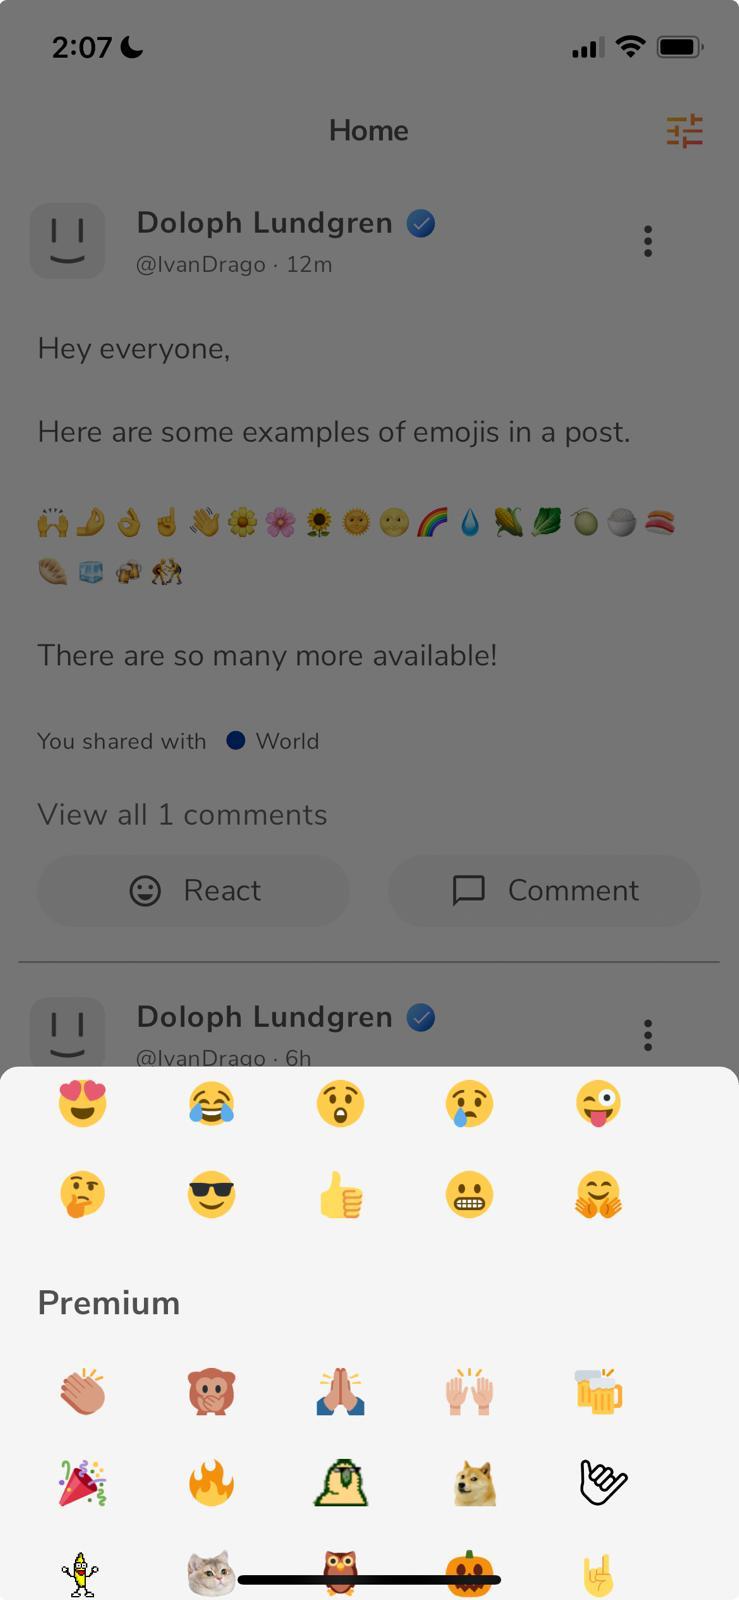
How to use Emojis as Reactions to posts and comments
- You can react to member posts and comments by clicking on the "React" button. In doing so, a pop up is displayed with optional emoji reactions to choose from.
- The list is divided by "Primary" and "Premium". This was tailored for future use based on a potential paid model that never materialize. This will be changed in future releases to be just 1 set of Emoji Reaction Pictographs.
Feed Filters
Openspace.Social introduces an innovative approach to managing your social feed by empowering users with advanced filter options based on Circles for Communities, Communities, Lists, and Connections. This level of customization allows users to tailor their social media experience to better suit their preferences and interests, ensuring they see the most relevant content.
Unique Algorithm Control
One of the standout features of OpenSpace.Social is how it puts the algorithm's control into the hands of the user. This approach is unique because:
- User Empowerment: Unlike traditional social media platforms where algorithms dictate what you see, OpenSpace.Social allows users to set their own parameters and preferences.
- Customization: Users can fine-tune their feed to reflect their exact interests and needs. This means no more missing out on important updates from close connections or wading through irrelevant posts.
- Transparency: Users know exactly why they are seeing certain posts, creating a more transparent and trust-based relationship with the platform.
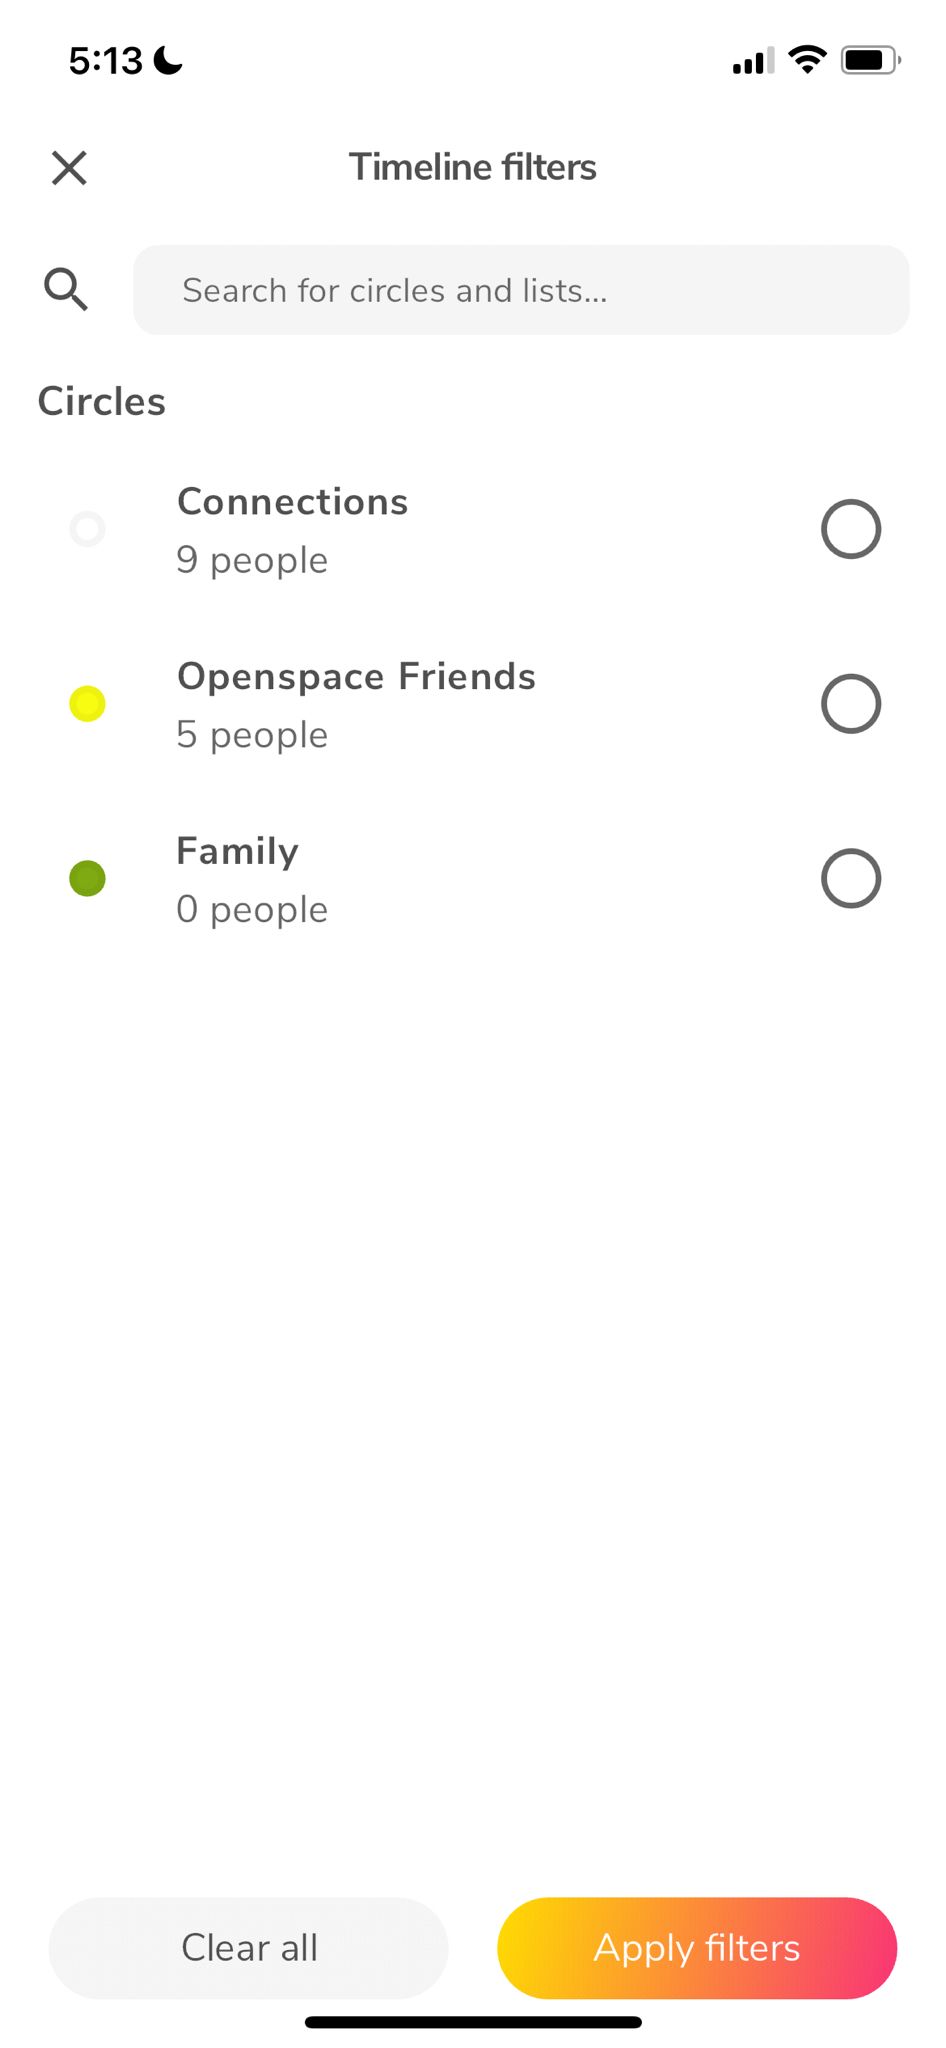
Key Features of Feed Filters
By clicking on the tune icon, the feed filter area is displayed.
- Circles for Communities: Create and manage circles within your communities to categorize your connections and topics. This allows you to prioritize content from specific groups or interests.
- Communities: Join various communities based on your interests. Each community can have its own feed, providing a focused stream of content related to that specific topic.
- Lists: Organize your connections into lists. You can create lists for family, friends, colleagues, or any other category, making it easier to see updates from particular groups.
- Connections: Manage your connections by filtering content based on your relationship with them. Prioritize updates from close friends and family while still staying informed about broader connections.
Search Screen Overview
The search screen on OpenSpace.Social is designed to provide users with a streamlined and intuitive way to discover content, communities, and connections. Here's a detailed look at how this feature works to enhance the user experience.
Unique Advantage of OpenSpace.Social’s Search Screen
OpenSpace.Social’s search screen stands out due to its combination of user-friendly design and powerful search capabilities:
- User-Friendly Interface: The clear toggle between trending and exploratory posts ensures that users can easily navigate between different types of content based on their preference.
- Dynamic Search Bar: The search bar that adapts to provide options for users, communities, and hashtags makes it straightforward for users to find exactly what they’re looking for.
- Enhanced Engagement: By facilitating easy discovery and engagement with trending and diverse content, the platform fosters a more interactive and connected user community.

Key Features of the Search screen area
By clicking on the icon, the Search area is displayed.
Initial View: Toggle Between Trending and Exploratory Posts
When users first access the search screen, they are presented with a clean and organized interface that immediately offers two primary options:
- Trending Posts: By default (represented by the icon), this option displays posts that are currently popular within public communities. These are posts that have garnered significant reactions and interactions, providing users with a snapshot of what's currently engaging the community.
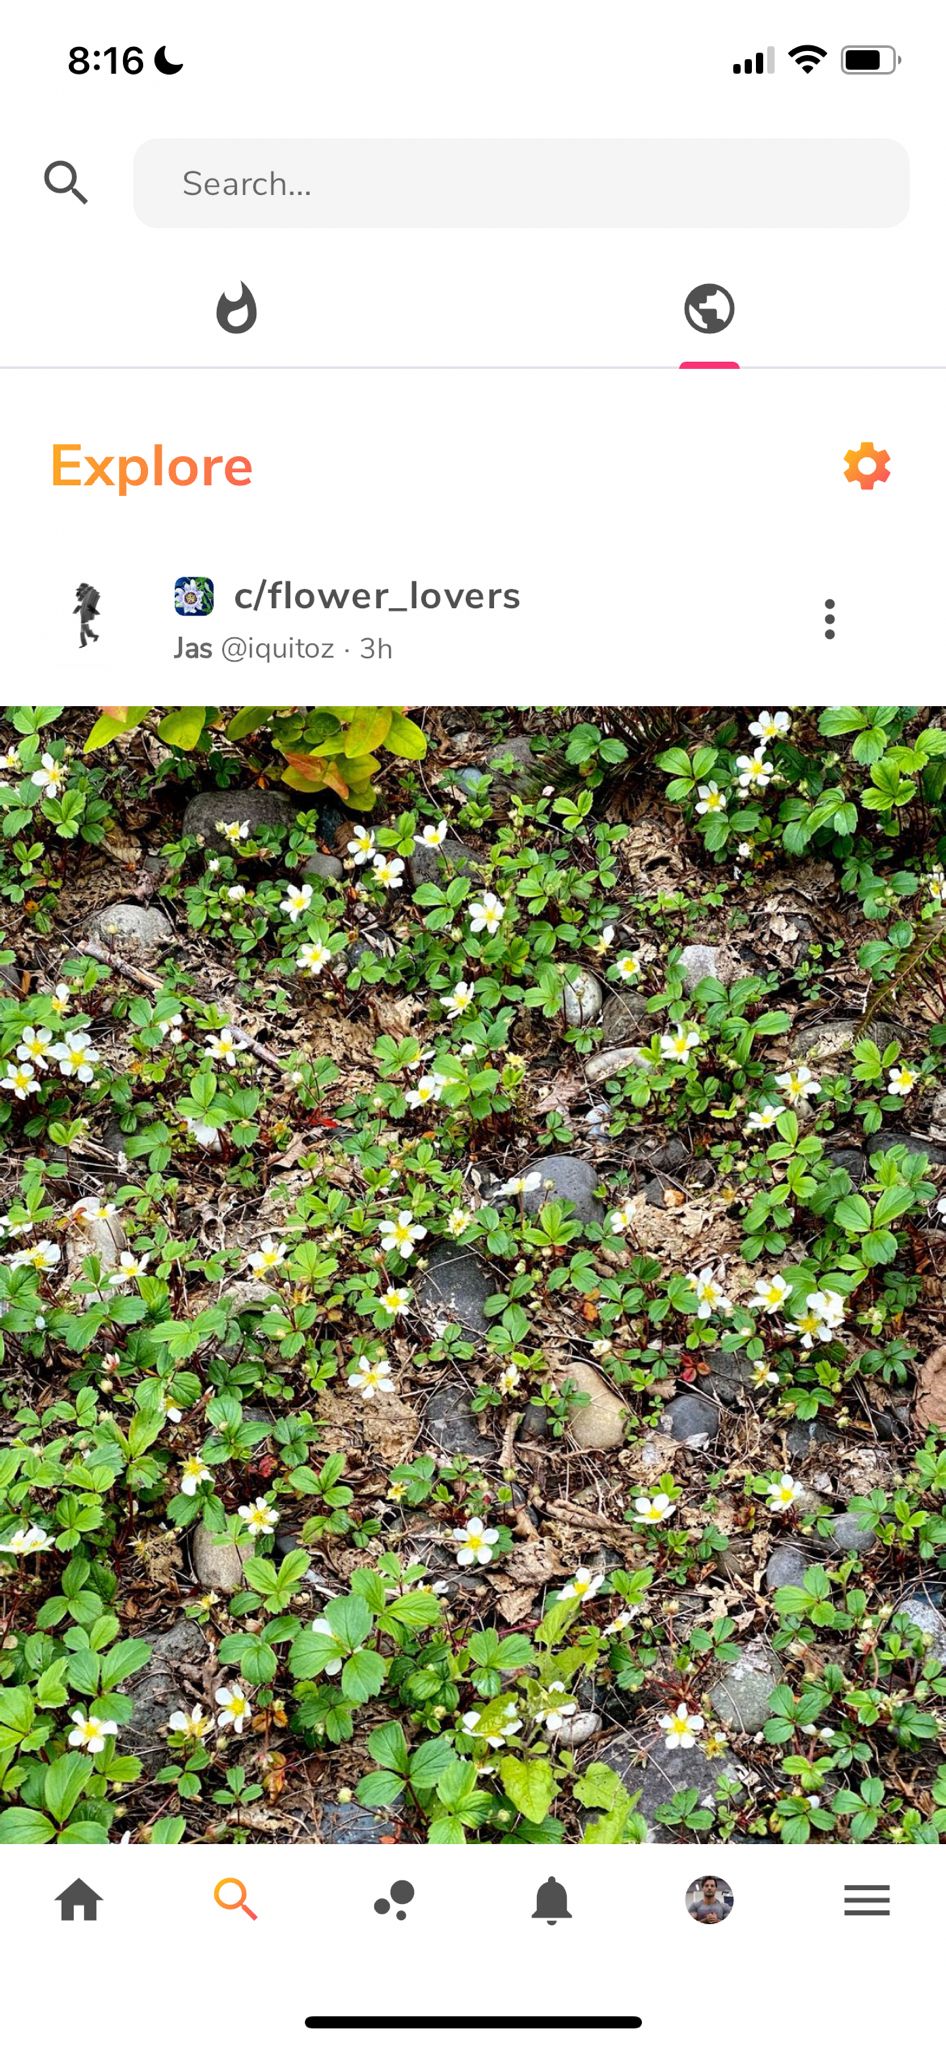
- Exploratory Posts: Represented by the icon. This option allows users to discover new and diverse content. It features posts from a variety of communities and topics, helping users to explore interests and find new areas of engagement that they might not have encountered otherwise.
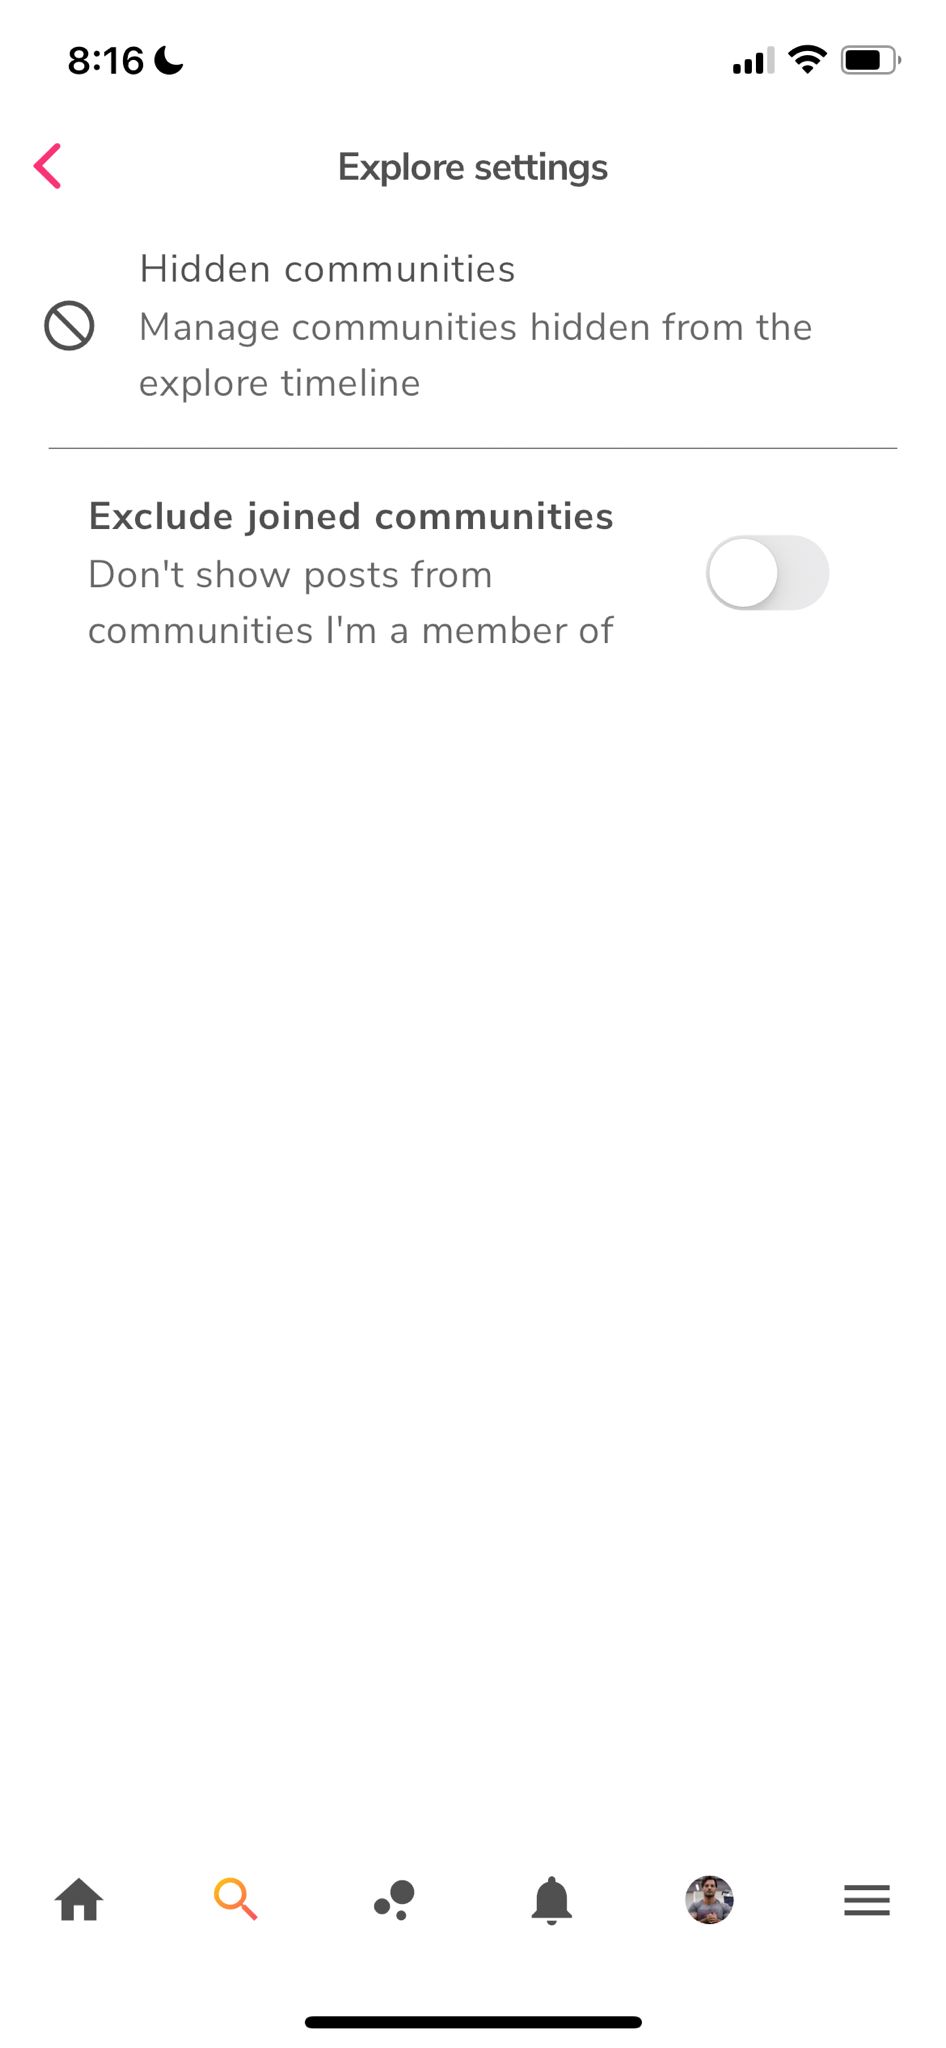
- Next to the "Explore" title, you see a icon that enables you to customize what you see in the exploratory filter. Options are shown in the screenshot below
- Both Trending and Explore must have more than 5 reactions. There is a slight difference in the details:
- Trending = must be posted to a public community, filtered by time. Newest first + must have 5 reactions minimum.
- Explore = Filtered by time + must have 5 reactions minimum.
Search Bar Functionality
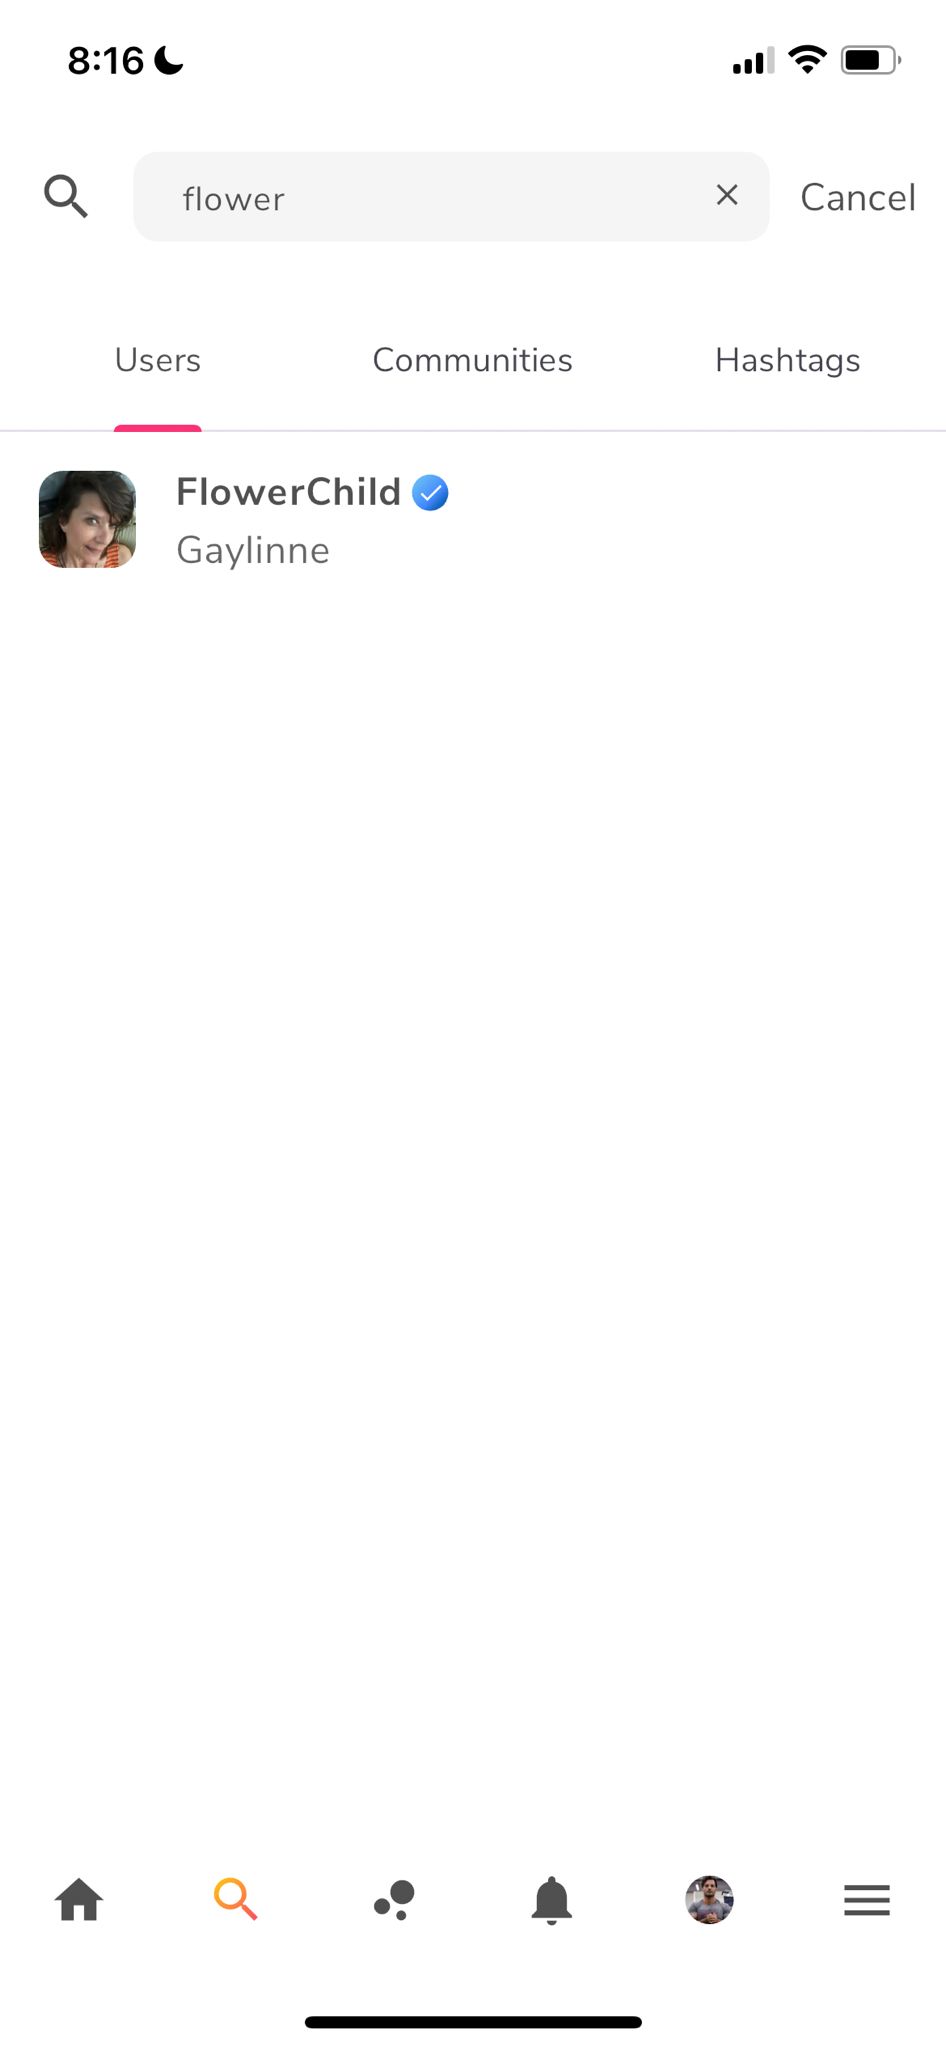
As soon as users start typing into the search bar, the interface dynamically updates to offer several targeted search options:
- Search for Users: This option enables users to find specific individuals on the platform. Whether they are looking for friends, influencers, or new connections, users can quickly locate profiles by typing in usernames or real names.
- Search for Communities: Users can search for specific communities based on their interests. Typing in keywords or community names will bring up a list of relevant groups that users can join or explore.
- Search for Hashtags: This feature allows users to find content tagged with specific hashtags. By typing in a hashtag, users can discover posts that are categorized under that tag, making it easier to follow trending topics and participate in ongoing conversations.
Best Practices for Using the Search Screen
- Toggle Between Trending and Exploratory: Regularly switch between trending and exploratory posts to stay updated on popular content and discover new interests.
- Use Specific Search Options: When searching for something specific, utilize the options to search for users, communities, or hashtags to quickly find the most relevant results.
- Engage with New Content: Explore new communities and hashtags regularly to keep your feed diverse and interesting.
- Refine Your Searches: Use precise keywords and hashtags to refine your searches and get the most relevant content tailored to your interests.
Followers vs Connections
OpenSpace.Social offers a nuanced approach to managing your social network by differentiating between followers and connections. This distinction allows users to tailor their social media experience more precisely, ensuring meaningful interactions and organized content consumption.
Unique Advantage of Openspace.Social’s System
What sets Openspace.Social apart is the ability to finely tune your social experience through advanced categorization and filtering options. By clearly distinguishing between followers and connections and providing robust tools for organizing them, OpenSpace.Social ensures that your feed remains both relevant and meaningful. This system gives users greater control over their social interactions, enhancing the overall user experience by focusing on what truly matters to each individual.
Followers
- Definition: Followers are users who have chosen to subscribe to your updates. These can be any random account interested in your content, whether or not you have a personal relationship with them.
- Categorization: Followers can be categorized into lists. This feature helps you organize and manage the content you receive from different groups of followers, making your feed more manageable and relevant.
- Example: You can create lists such as "Fans," "Colleagues," or "Event Attendees" to keep track of different types of followers and their content.
- Content Separation: By using lists, you can filter and prioritize content from specific groups of followers. This ensures that your feed doesn’t become overwhelmed with irrelevant posts, allowing you to focus on what matters most.
Connections
- Definition: Connections are users with whom you have a genuine, mutual relationship. These are typically people you know personally, such as friends, family, or close colleagues.
- Circles for Organization: Connections can be placed into Circles. This feature allows for an even more refined content organization, helping you separate and prioritize updates from your closest and most important relationships.
- Example: You can create Circles like "Family," "Close Friends," or "Work Associates" to streamline content from these groups.
- Content Prioritization: By organizing connections into Circles, you can ensure that updates from your most meaningful relationships are always front and center in your feed. This helps maintain close connections and ensures you don’t miss important updates from your inner circle.
Key Differences
- Nature of Relationship:
- Followers: Can be any user interested in your content, often without a personal connection.
- Connections: Reserved for users with whom you have a personal or meaningful relationship.
- Organization
- Followers: Organized into lists to filter and manage content from different groups.
- Connections: Organized into Circles, providing a more intimate and prioritized content experience.
- Content Management:
- Followers: Lists help in segregating content from various followers, ensuring a clutter-free feed.
- Connections: Circles allow for a focused view of updates from your most valued relationships, keeping important content readily accessible.
Lists and Circles
Lists and Circles are tied to Followers and Connections. Much of what these 2 features provide has already been written about under the previous section. Having said that, here is a list of some key points to know about regarding Lists and Circles.
Key Points about Lists and Circles
Lists
- Purpose: Used to organize and manage followers.
- Functionality: Helps categorize followers into specific groups, such as "Fans," "Colleagues," or "Event Attendees."
- Benefit: Allows you to filter and prioritize content from different follower groups, keeping your feed relevant and clutter-free.
Circles
- Purpose: Used to organize and prioritize connections.
- Functionality: Enables you to place connections into groups like "Family," "Close Friends," or "Work Associates."
- Benefit: Ensures that updates from your most meaningful relationships are front and center, helping maintain close connections and ensuring important content is easily accessible.
How to create a circle and add users to it
- First, create a Circle. In the upper right corner of the web-app, under your username, is an item called Circles. Click on that, add a name, and proceed to complete that creation of the circle.
- Part two, navigate to the profile page of someone you want to add to a Circle. Find and click on the three vertical dots to the right of the Follow button. On the menu that opens, choose "Connect with User". You'll then see an option to add that person to a Circle. That's it!
Note
Posting to a specific List or Circle, will ensure your post is not seen by anyone else other than those accounts you've configured to be part of the particular List or Circle that you are posting to. Essentially it is a way to post privately to certain members.
Profile Options
Openspace.Social offers a variety of profile options that allow users to customize their presence and control their visibility on the platform. These options ensure that users can manage their profiles in a way that suits their privacy preferences and engagement goals.
Key Features of the user Profile area
By clicking on the icon, the User Profile area is displayed.
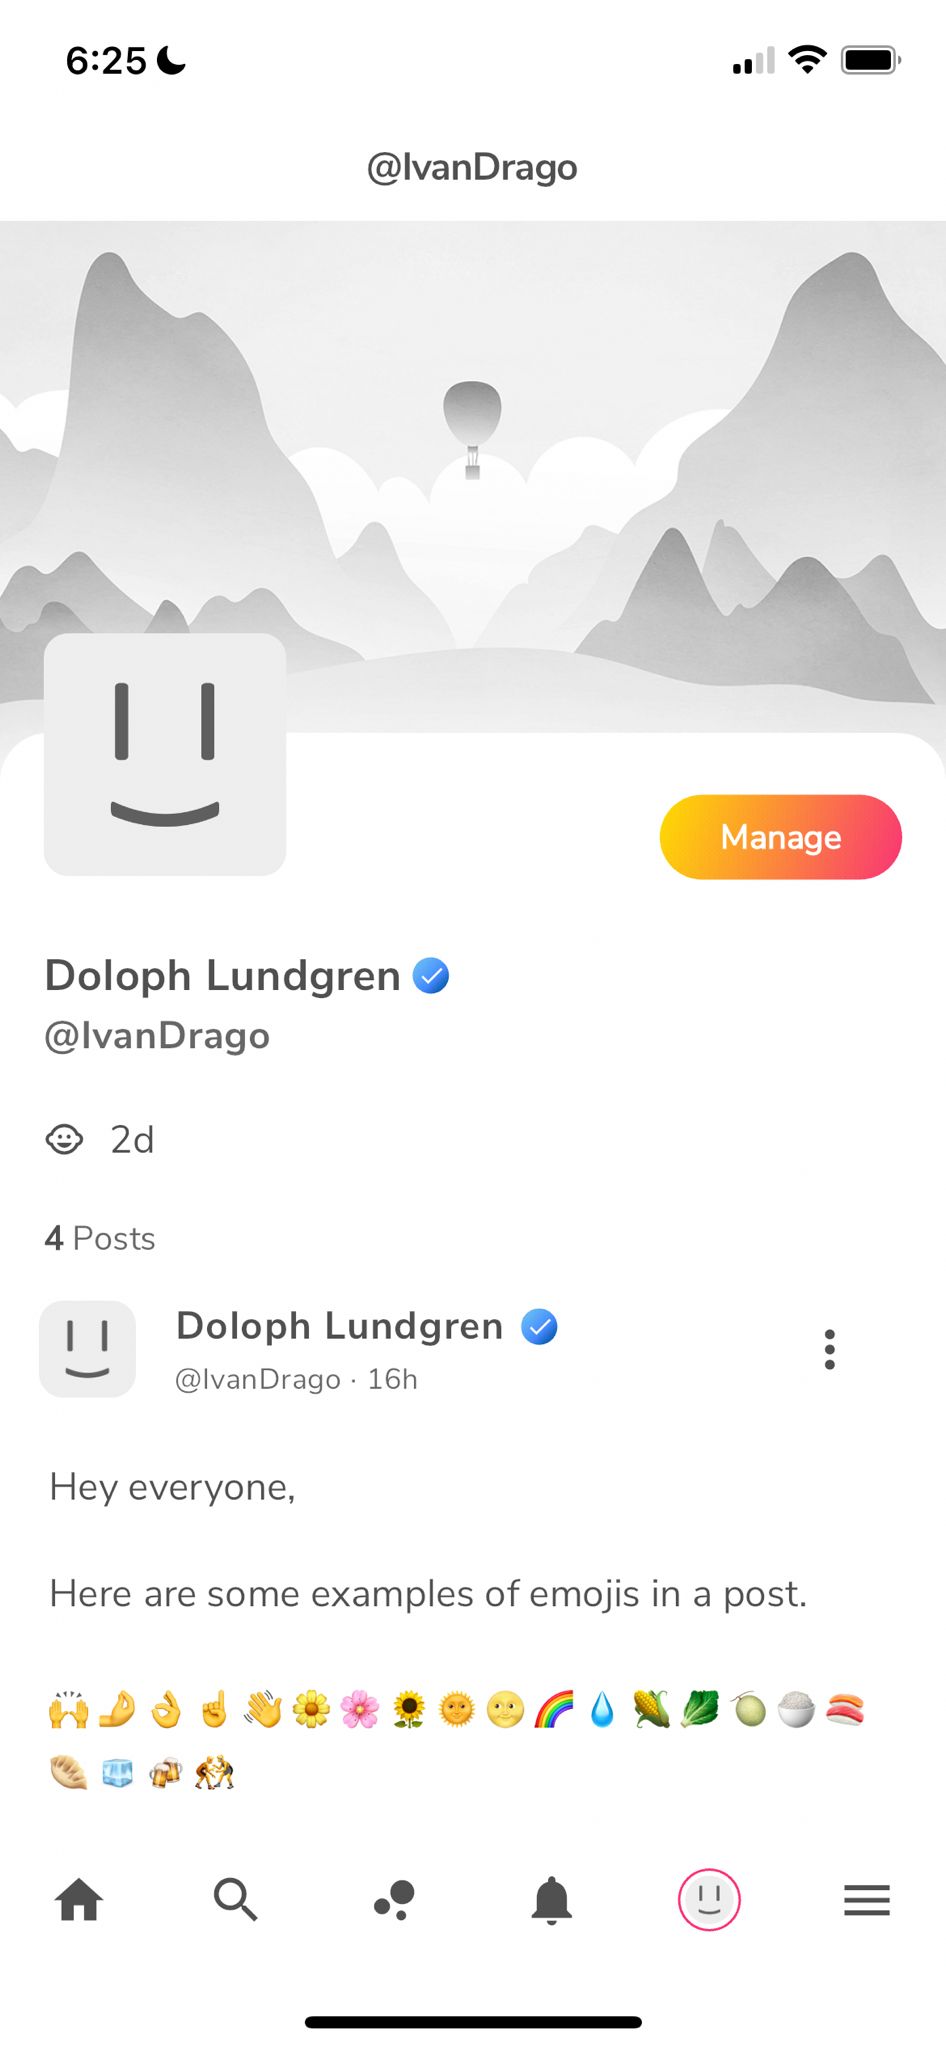
Initial View:
When users first access the User Profile screen, they are presented with basic information about the user they are displaying.
- Along with basic info about the user, the page also displays recent posts they've made publicly to their followers or public communities. The screenshot to the left shows an individuals own profile.
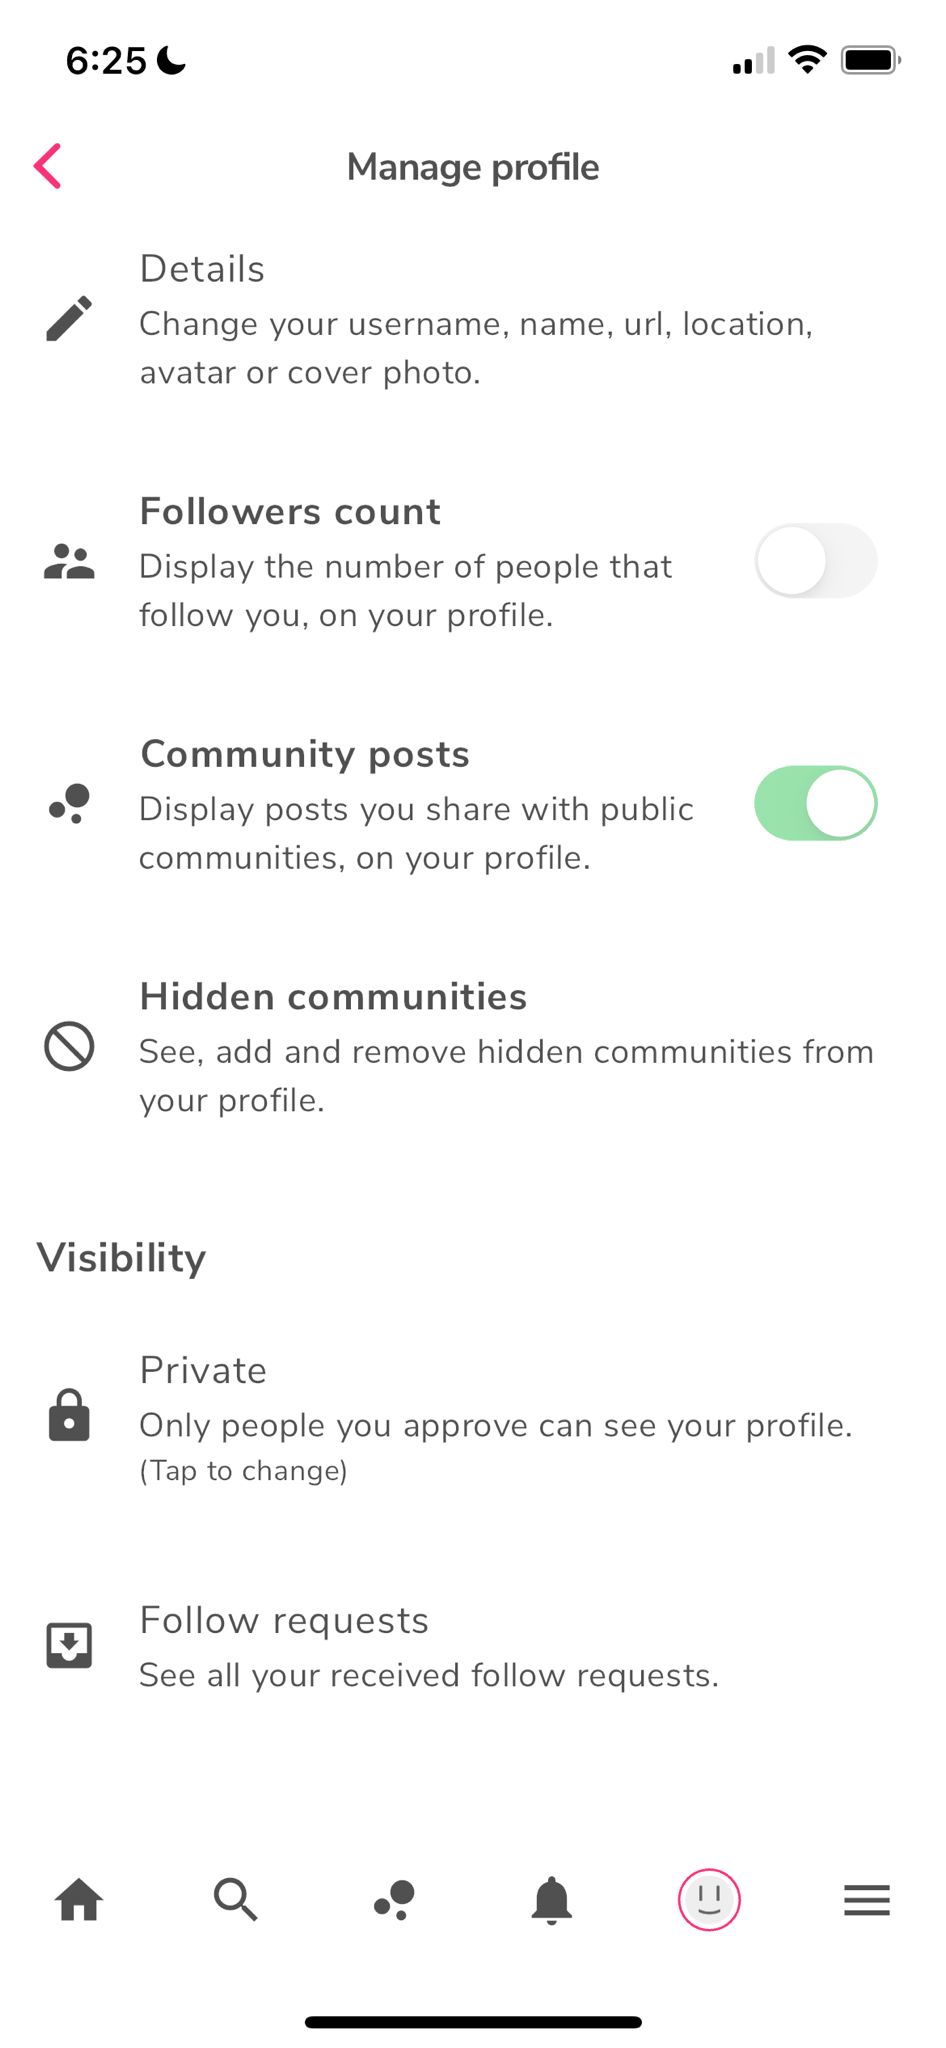
- By clicking on "Manage", you will be displayed a list of details that will allow you to modify specific settings on your profile
- Details: Change your username, name, url, location, profile picture, cover photo or self bio.
- Followers Count: Indicate whether you want your follower count displayed on your profile.
- Community Posts: Toggle option to display posts you've shared to public communities or not.
- Hidden Communities: See, add and remove hidden communities from your profile.
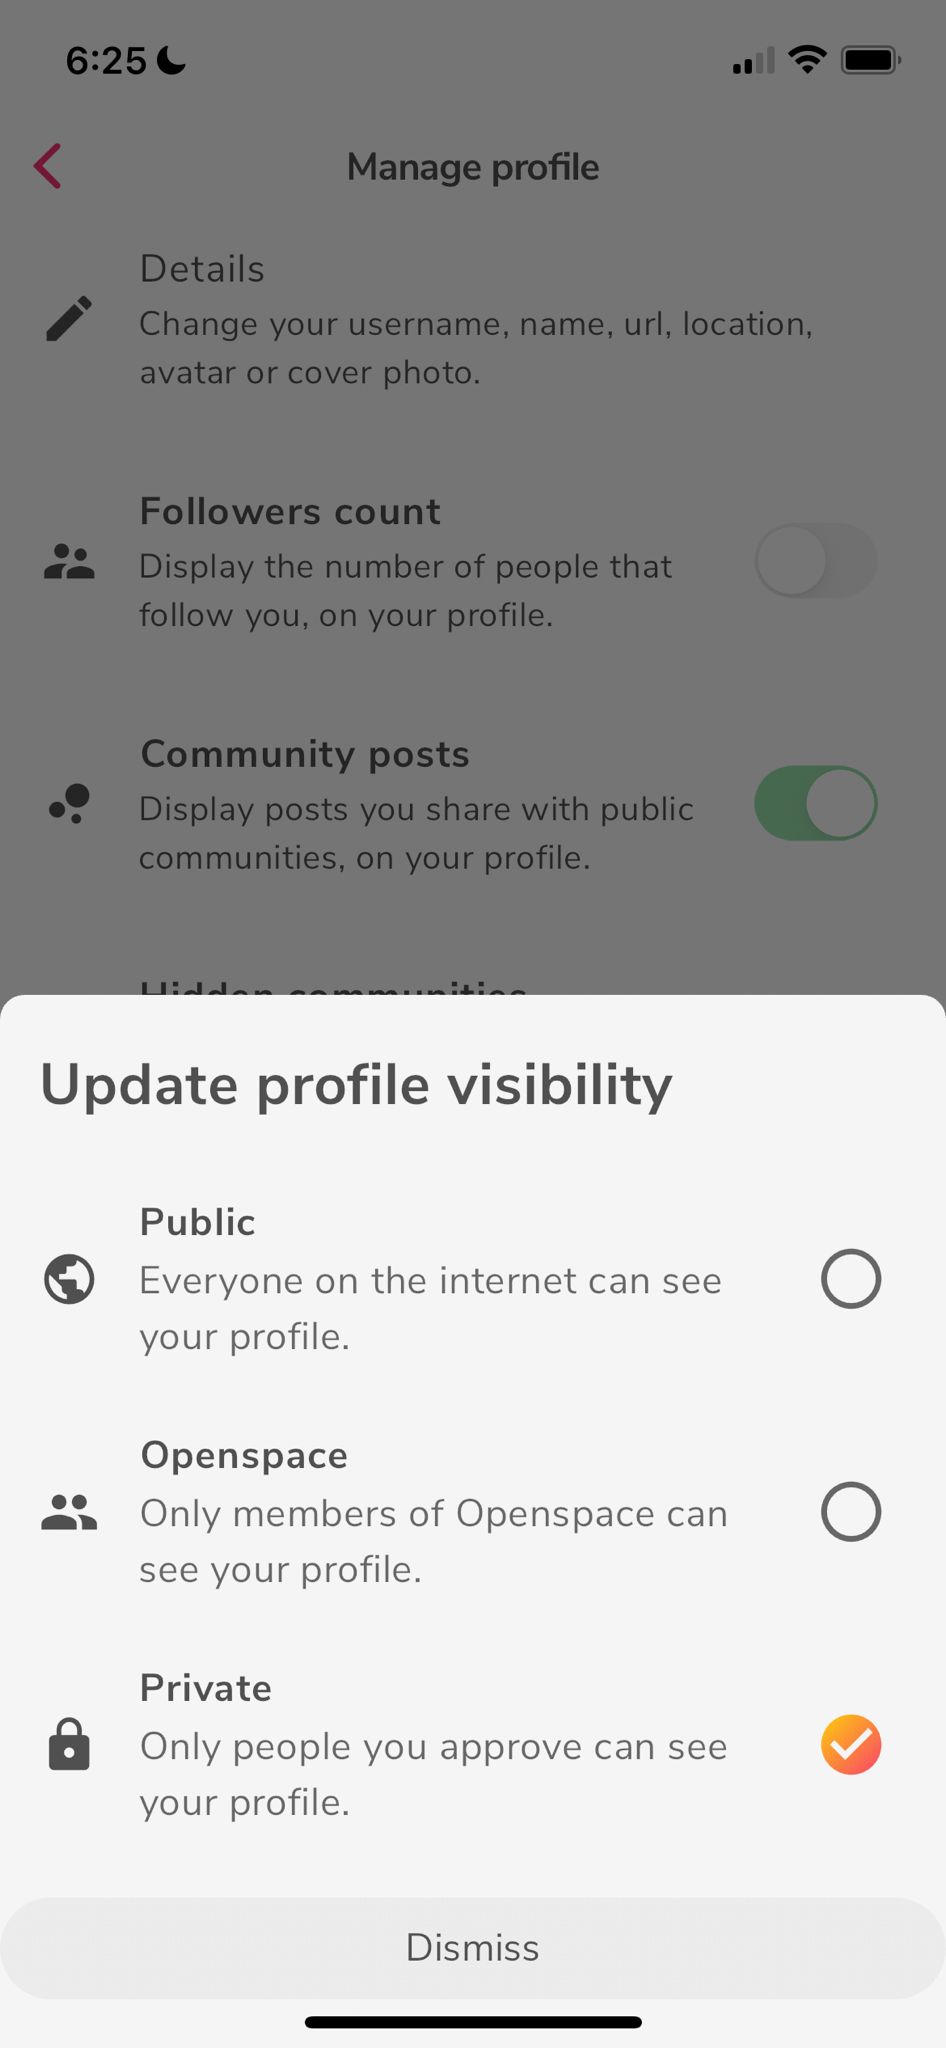
- Visibility: Option to make your profile Public (all can see), Private (only followers can see), or Openspace only (Only available to members of the platform).
- Follow Requests: Option to display all of your follow requests.
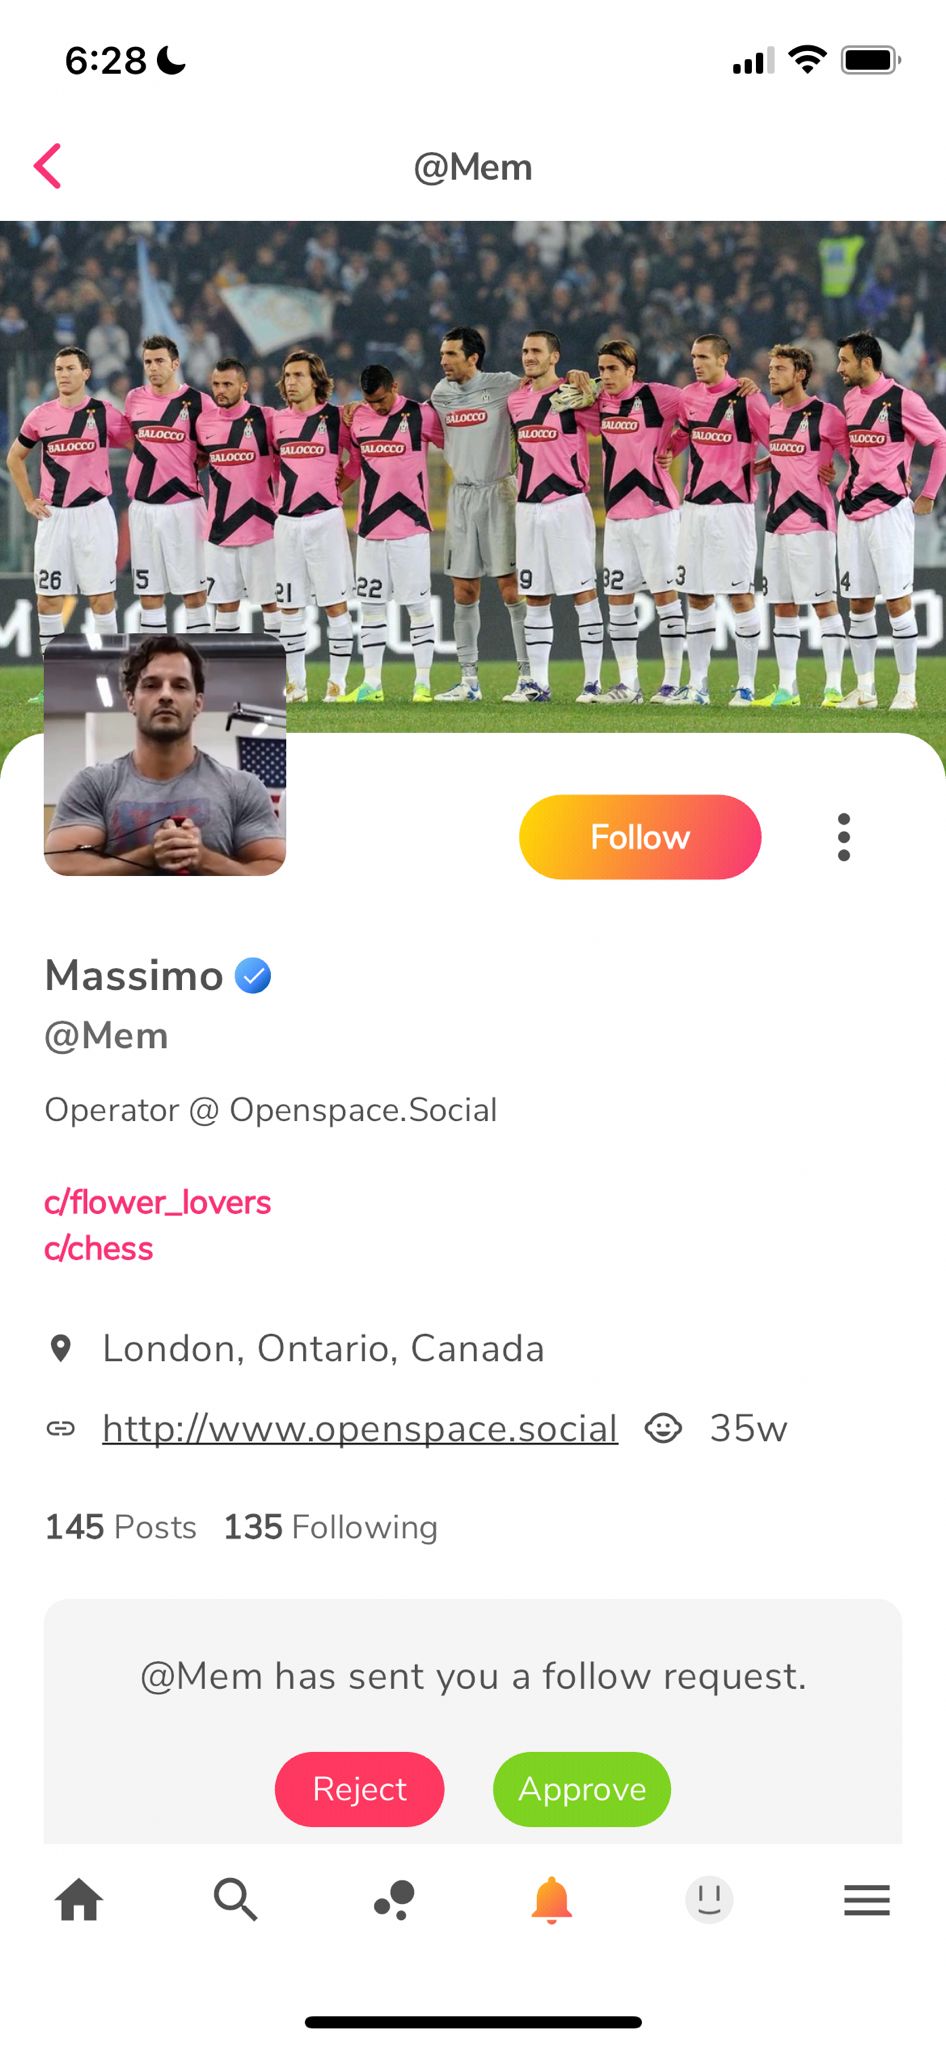
Accepting Follow Requests on Private Profiles
If you have set your profile up to be "Private" then Follow Requests will show up in Notifications, which will then take you to your profile to accept. The screenshot to the left provides an idea of how it will look like.
Notifications
Openspace.Social provides a comprehensive notification system designed to keep users informed about activities related to their posts, interactions, and community engagements. Notifications are divided into two main categories: General and Requests, each serving distinct purposes to ensure users can easily manage and respond to updates on the platform.
Accepting Follow Requests on Private Profiles
By clicking on the icon on the dashboard, you will be presented with the Notifications screen.
TIP - by clicking on the displays all notifications, and tapping it again marks them all as read. 😉
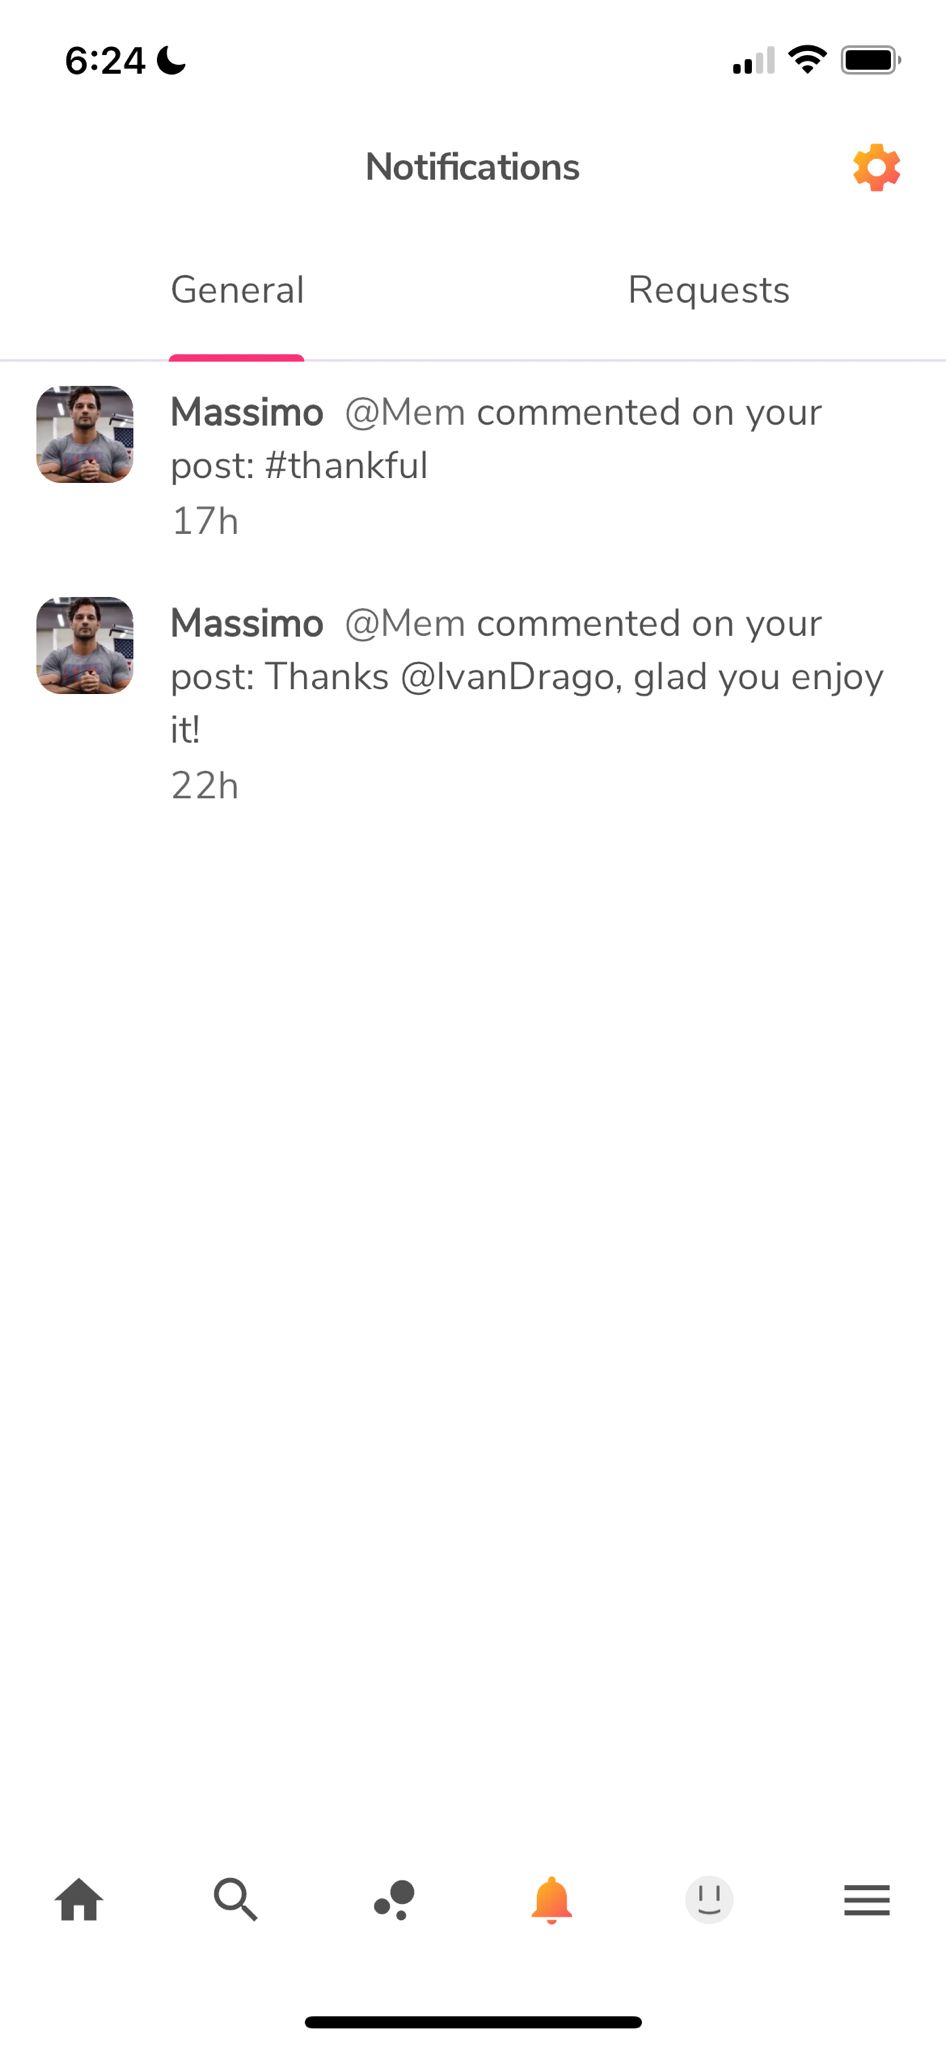
General Notifications
General notifications keep users updated on interactions related to their content and social activities. This category includes:
- Post Reactions: Notifications when someone reacts to your posts with likes, loves, or other emoji reactions.
- Comments: Alerts you when someone comments on your posts, ensuring you can quickly engage in conversations.
- Replies: Notifies you when someone replies to your comments or engages in a thread you’re part of, facilitating ongoing discussions.
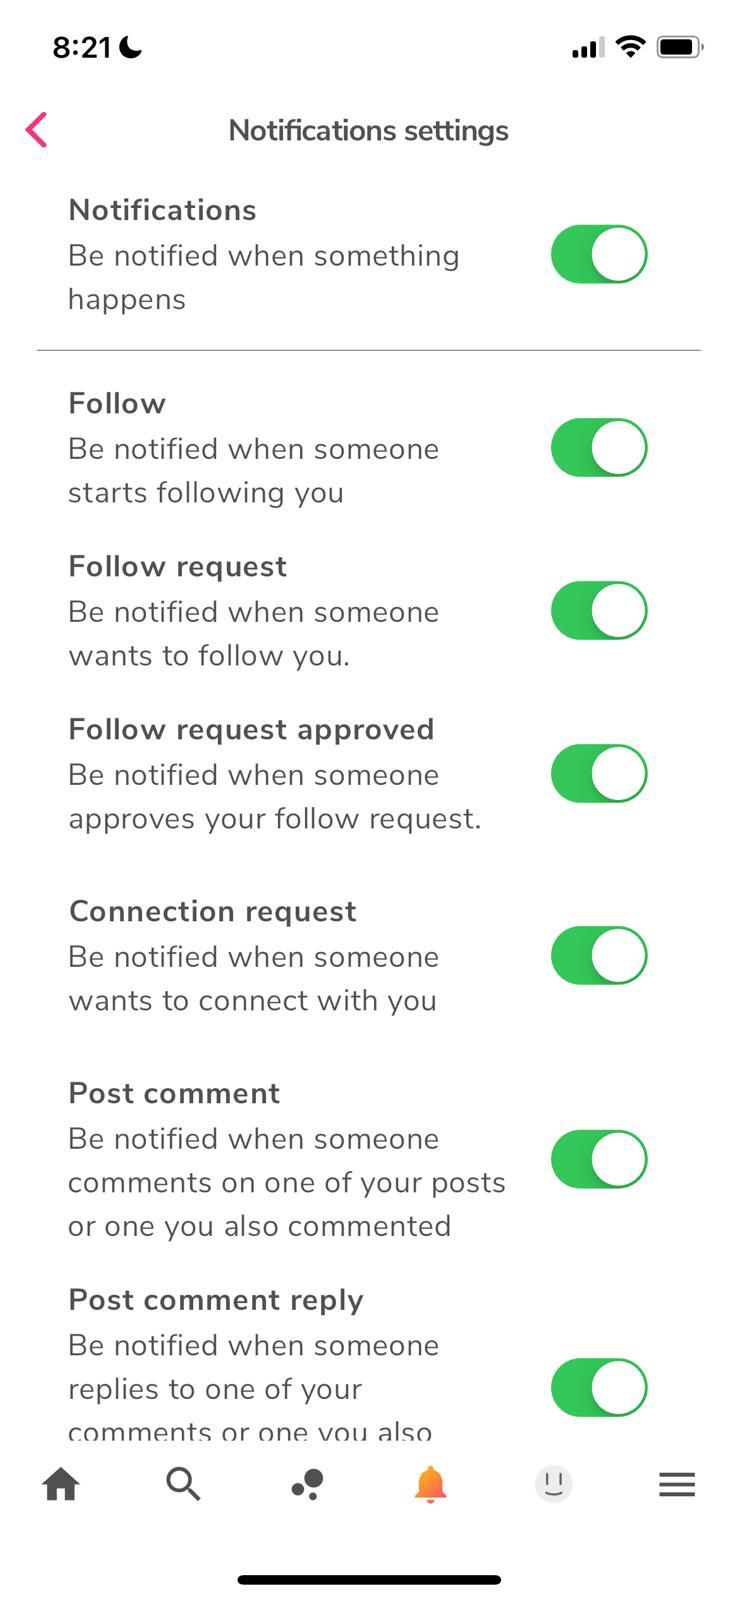
The icon allows you to modify the Notification settings for the app as shown below:
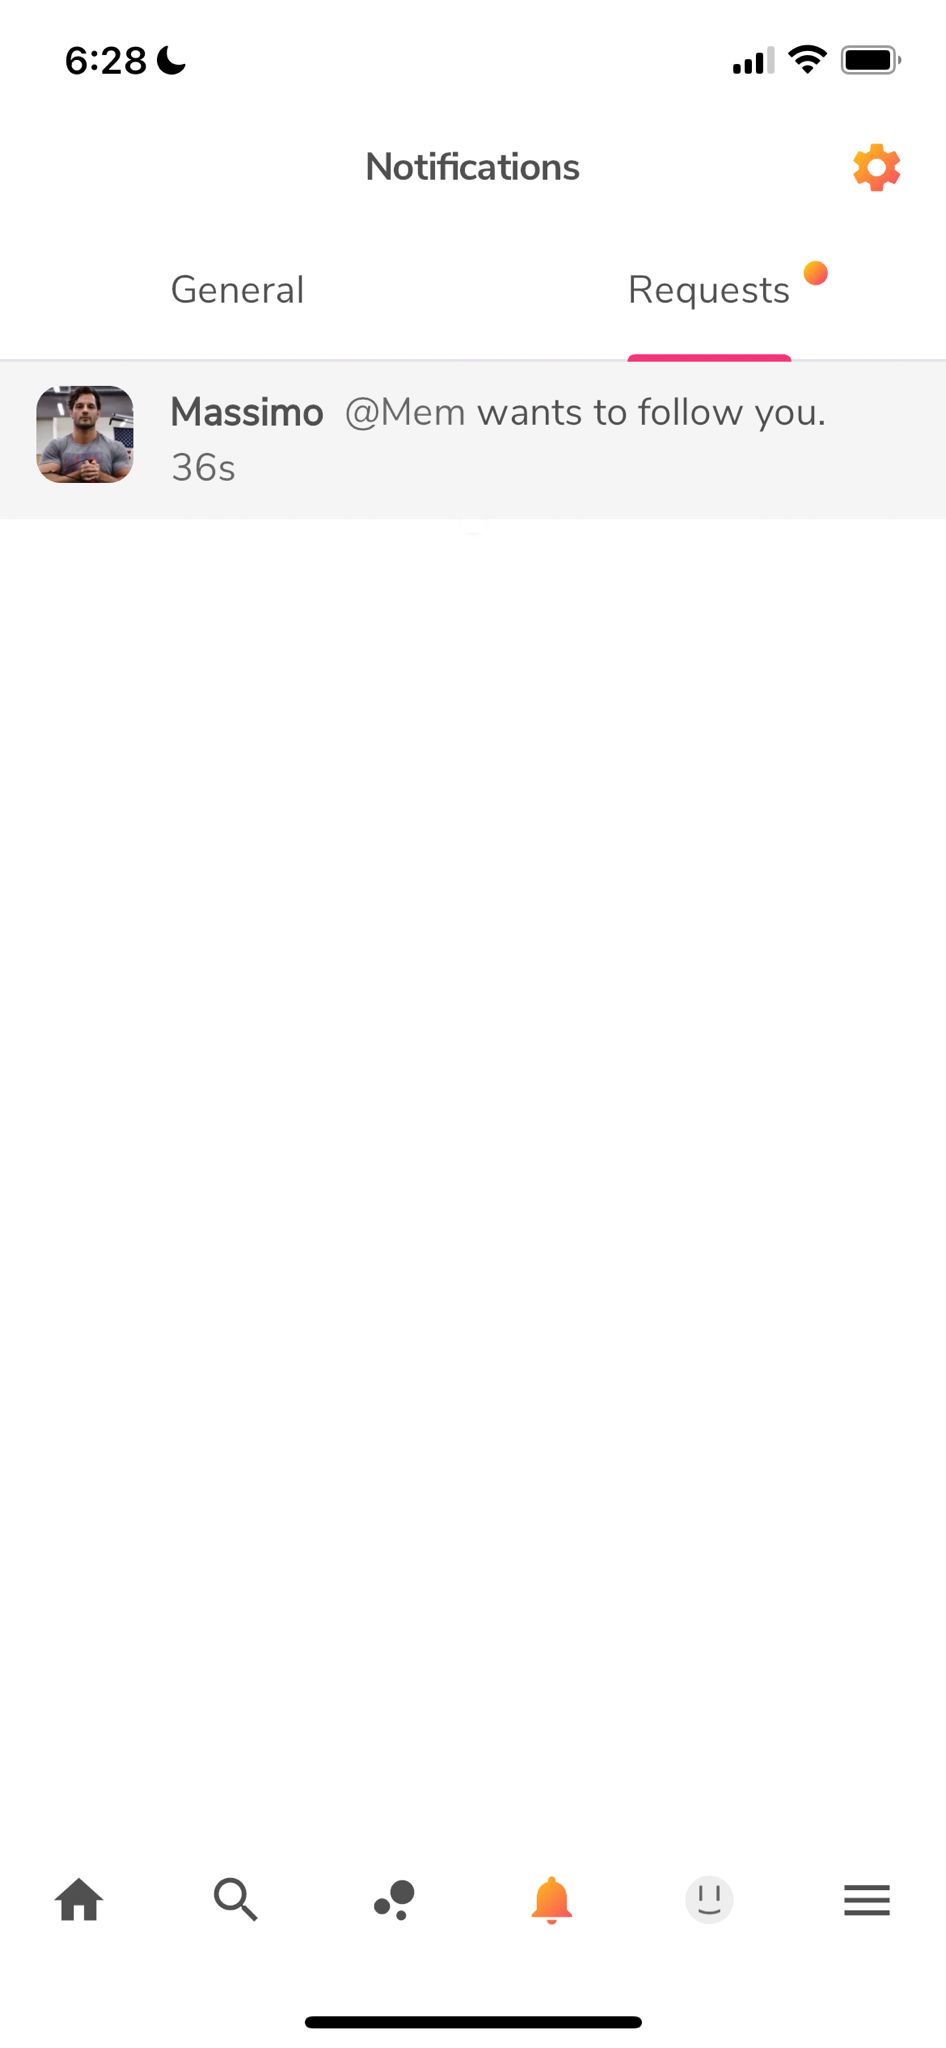
Notification Requests
Requests notifications manage and notify users about requests related to social connections and community participation. This category includes:
- Follow Requests: Alerts you when someone wants to follow your profile. You can review and approve or deny these requests, maintaining control over your follower list.
- Community Join Requests: Notifies you when someone requests to join a community you manage. This allows you to vet and approve new members, ensuring that community standards are maintained.
Invite Process
The invite process can be tricky for those new to the platform. Ultimately, there are several ways to gain access to the platform which are described in detail below.
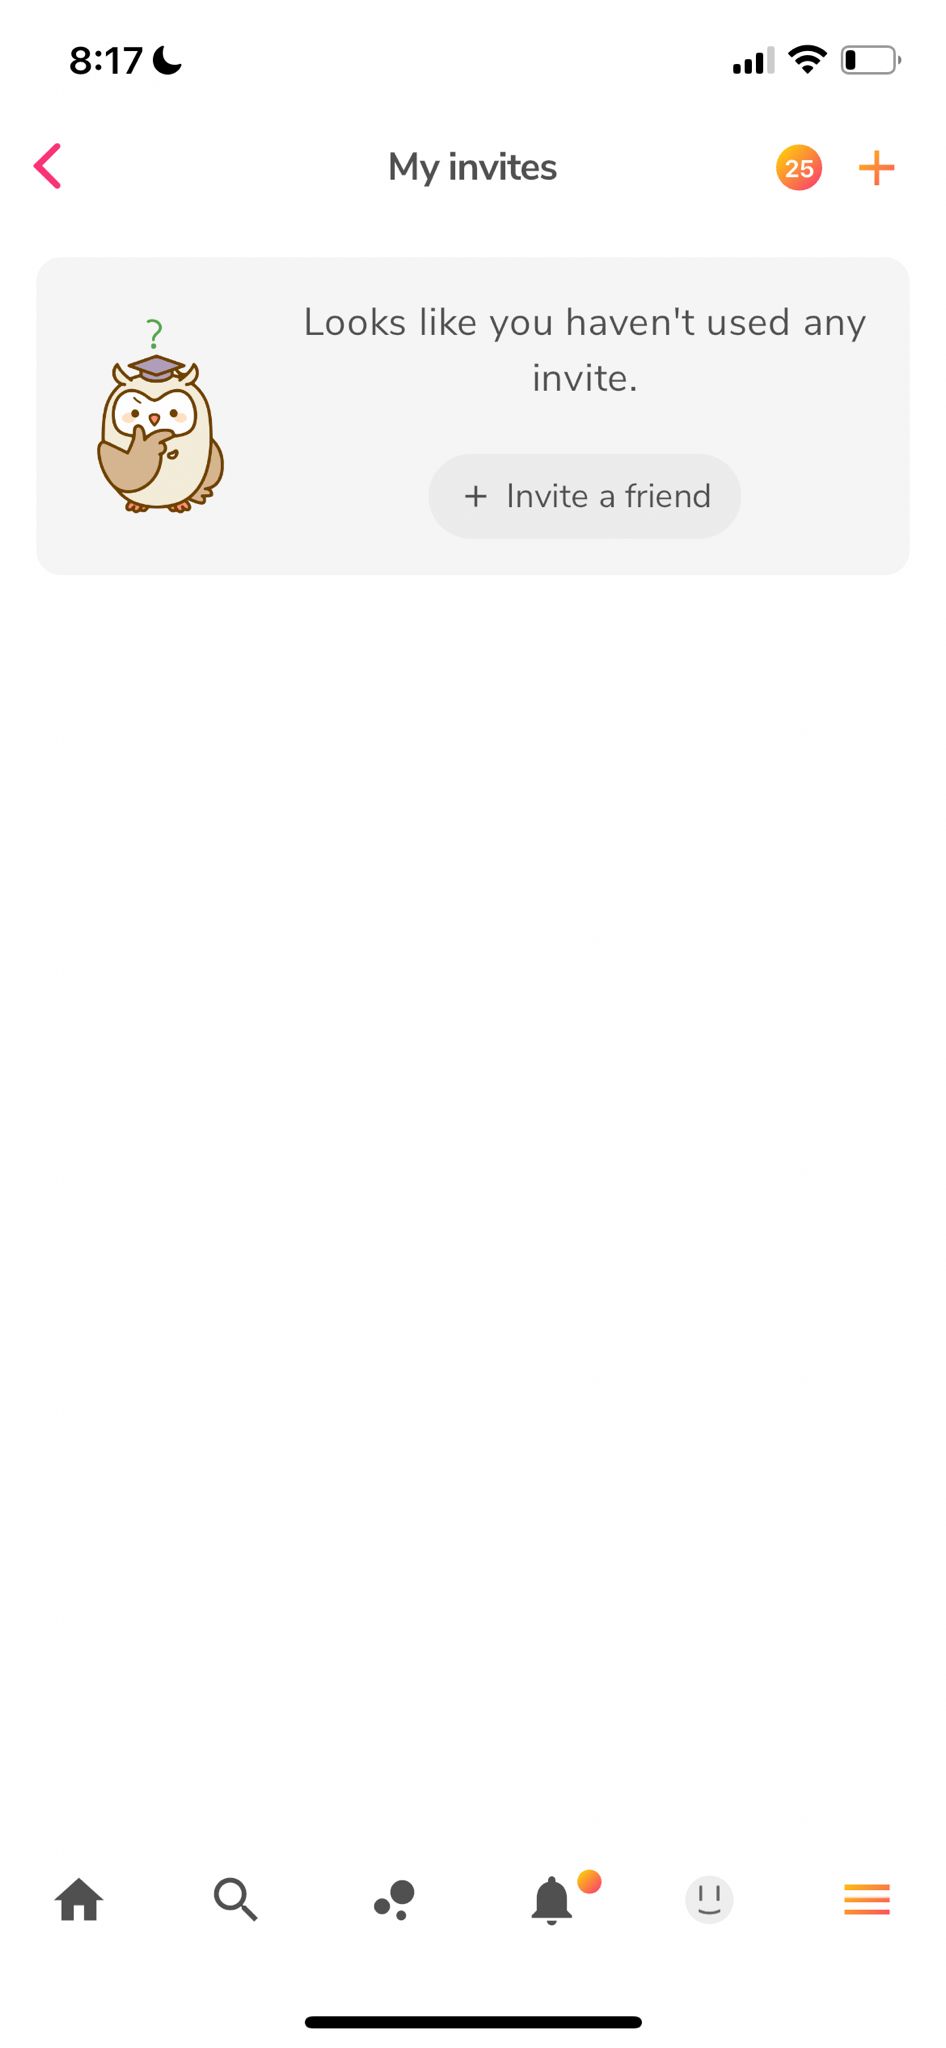
My Invites Area
This screen is the default view of the "My Invites" area found in the settings menu.
- On the top right hand corner you can see a circle with the number "25" in it. This indicates that you have 25 invites that you can send to friends and family. If you happen to run out, you can always request more by emailing admin@openspacelive.com. Please be sure to include your username in the email so we know which account to apply the extra invites to.
- Next to the circle you see a "+" sign. This is where you can click to create a new invitation.
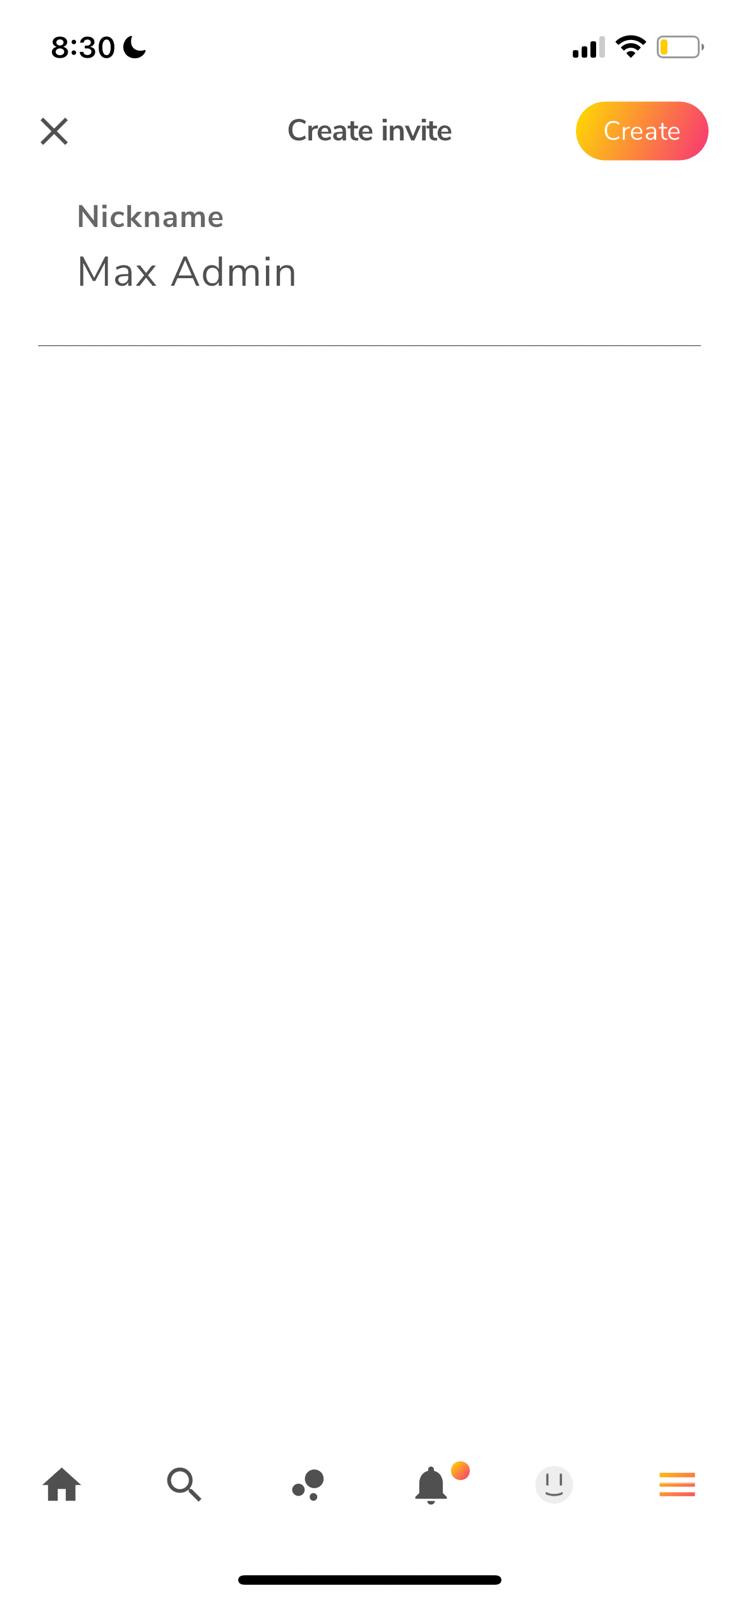
Create Invite Area
This screen is the default view of the "Create Invite" area that is displayed after clicking the "+" of the previous screen.
- In the center of the screen you are required to type a nickname for your own tracking purposes only.
- Once the nickname is entered, tap the "Create" button in the top right corner to proceed to the next screen.
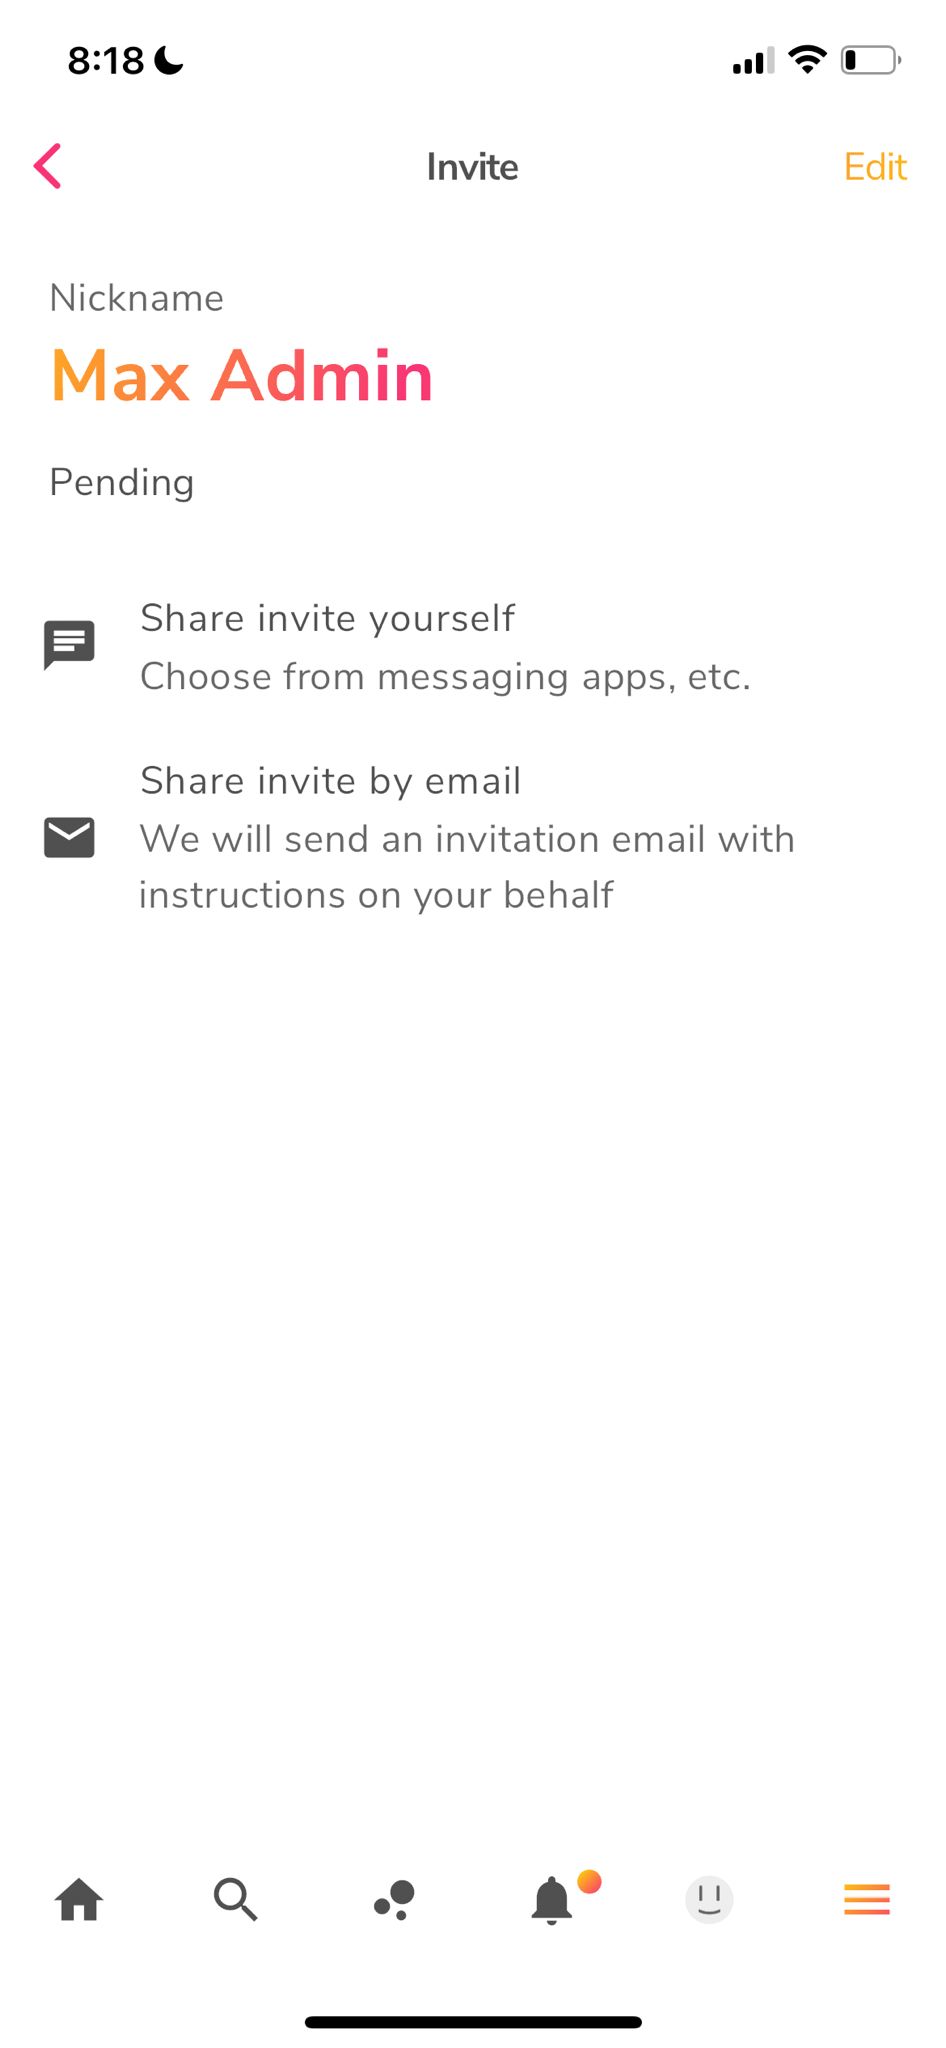
Invite Area
This screen displays details of your invite.
- The Edit button in the top right corner allows you to make changes to the nickname for this invite.
- The "Pending" message below the nickname suggests that this invite has not been activated by the user yet.
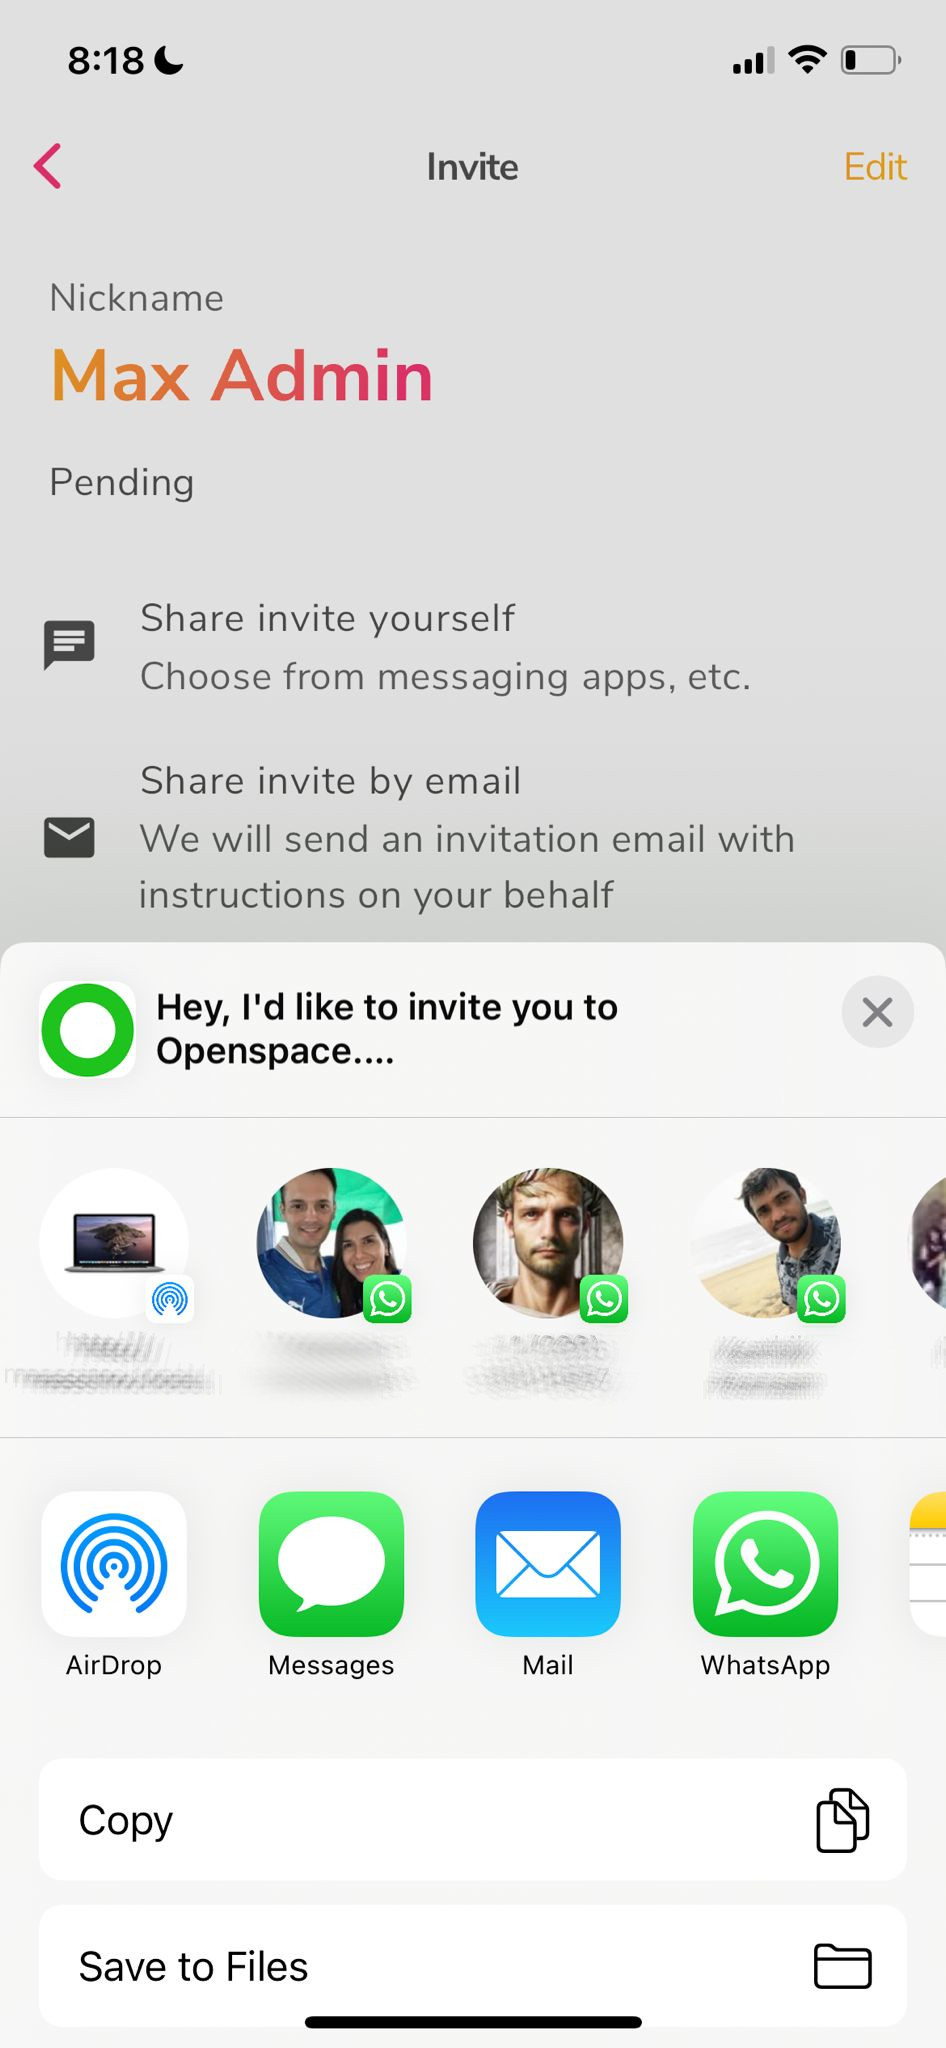
- Share Invite yourself - This allows you the ability to directly copy the contents of the invite and send it directly to your friend or family member via text message. The message will include information that should be used by the person wanting access to Openspace such as:
- Link to the Android playstore download location
- Link to the iOS App Store download location
- A unique code required to type in the sign-up form upon registration to activate the account
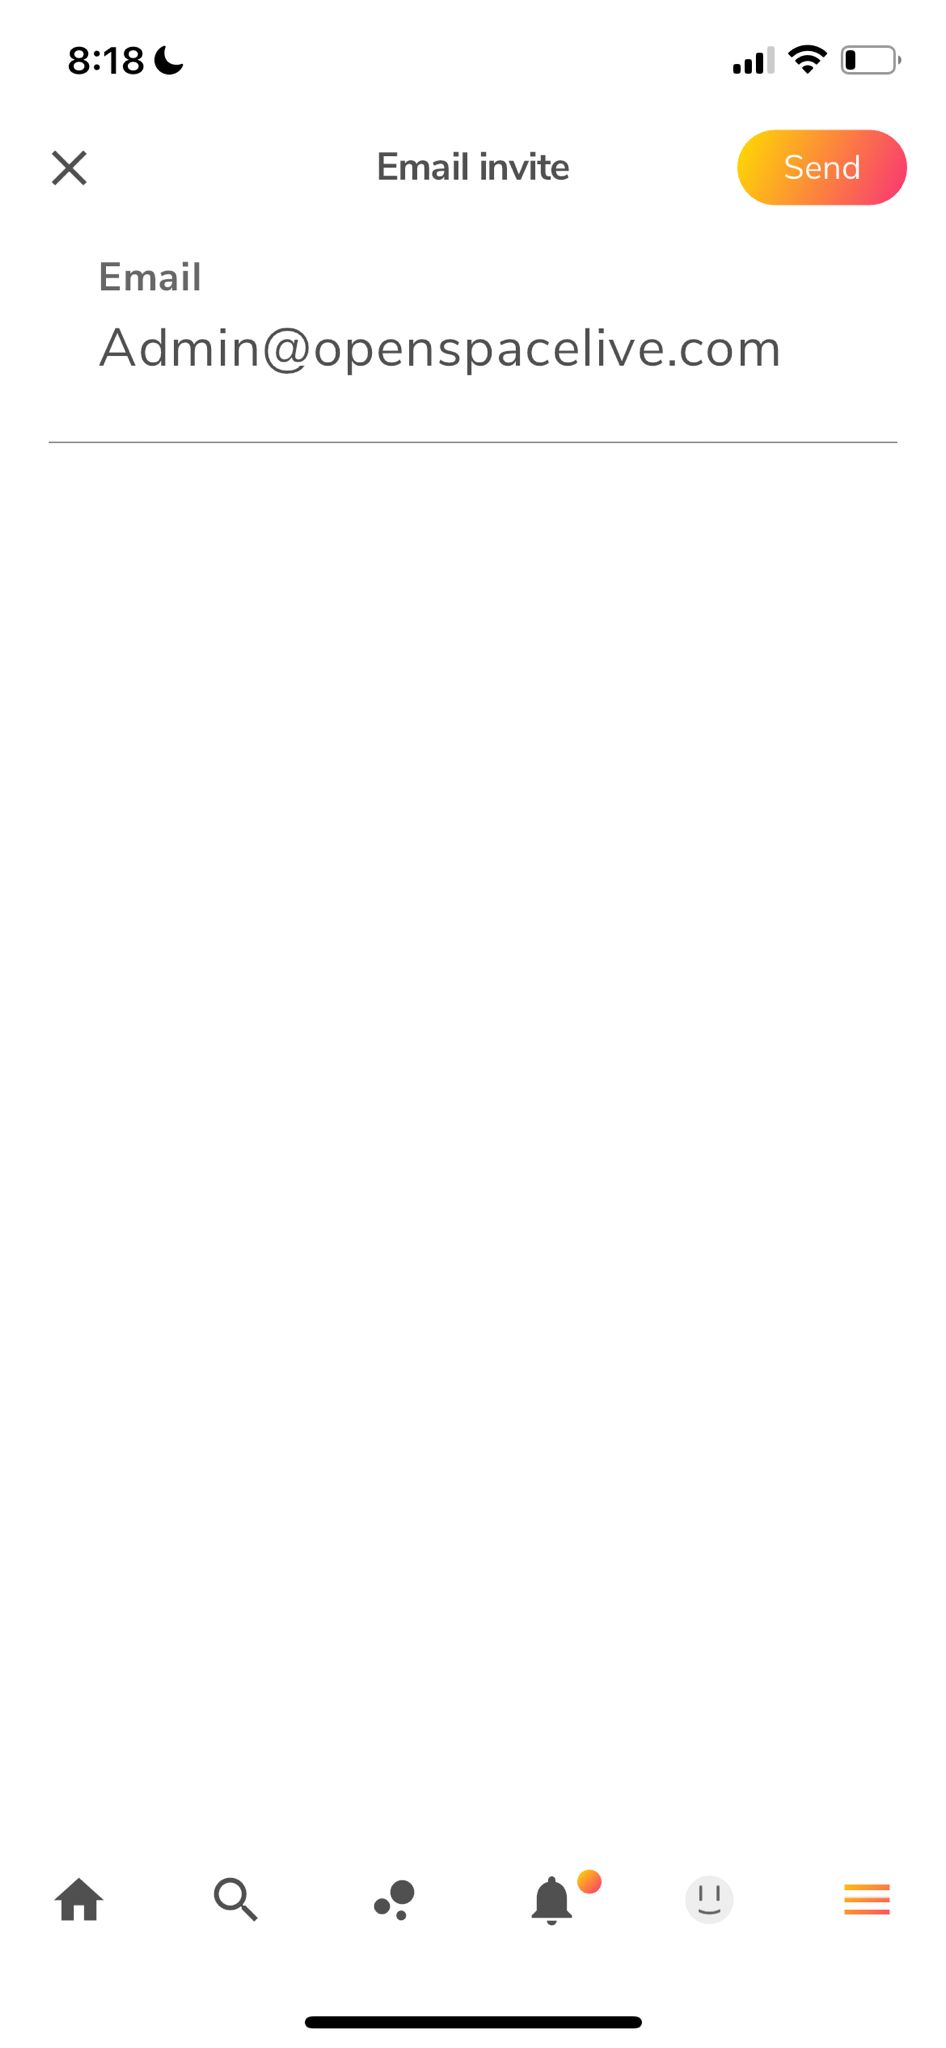
- Share Invite by email - This allows you to send an automated email to your friend and family member which includes the same details as "Share Invite yourself" with the added bonus of a web-link to sign up through the website. Be sure to let your friends and family know to check their junk mail folder in case the spam filters re-route the email unintentionally.
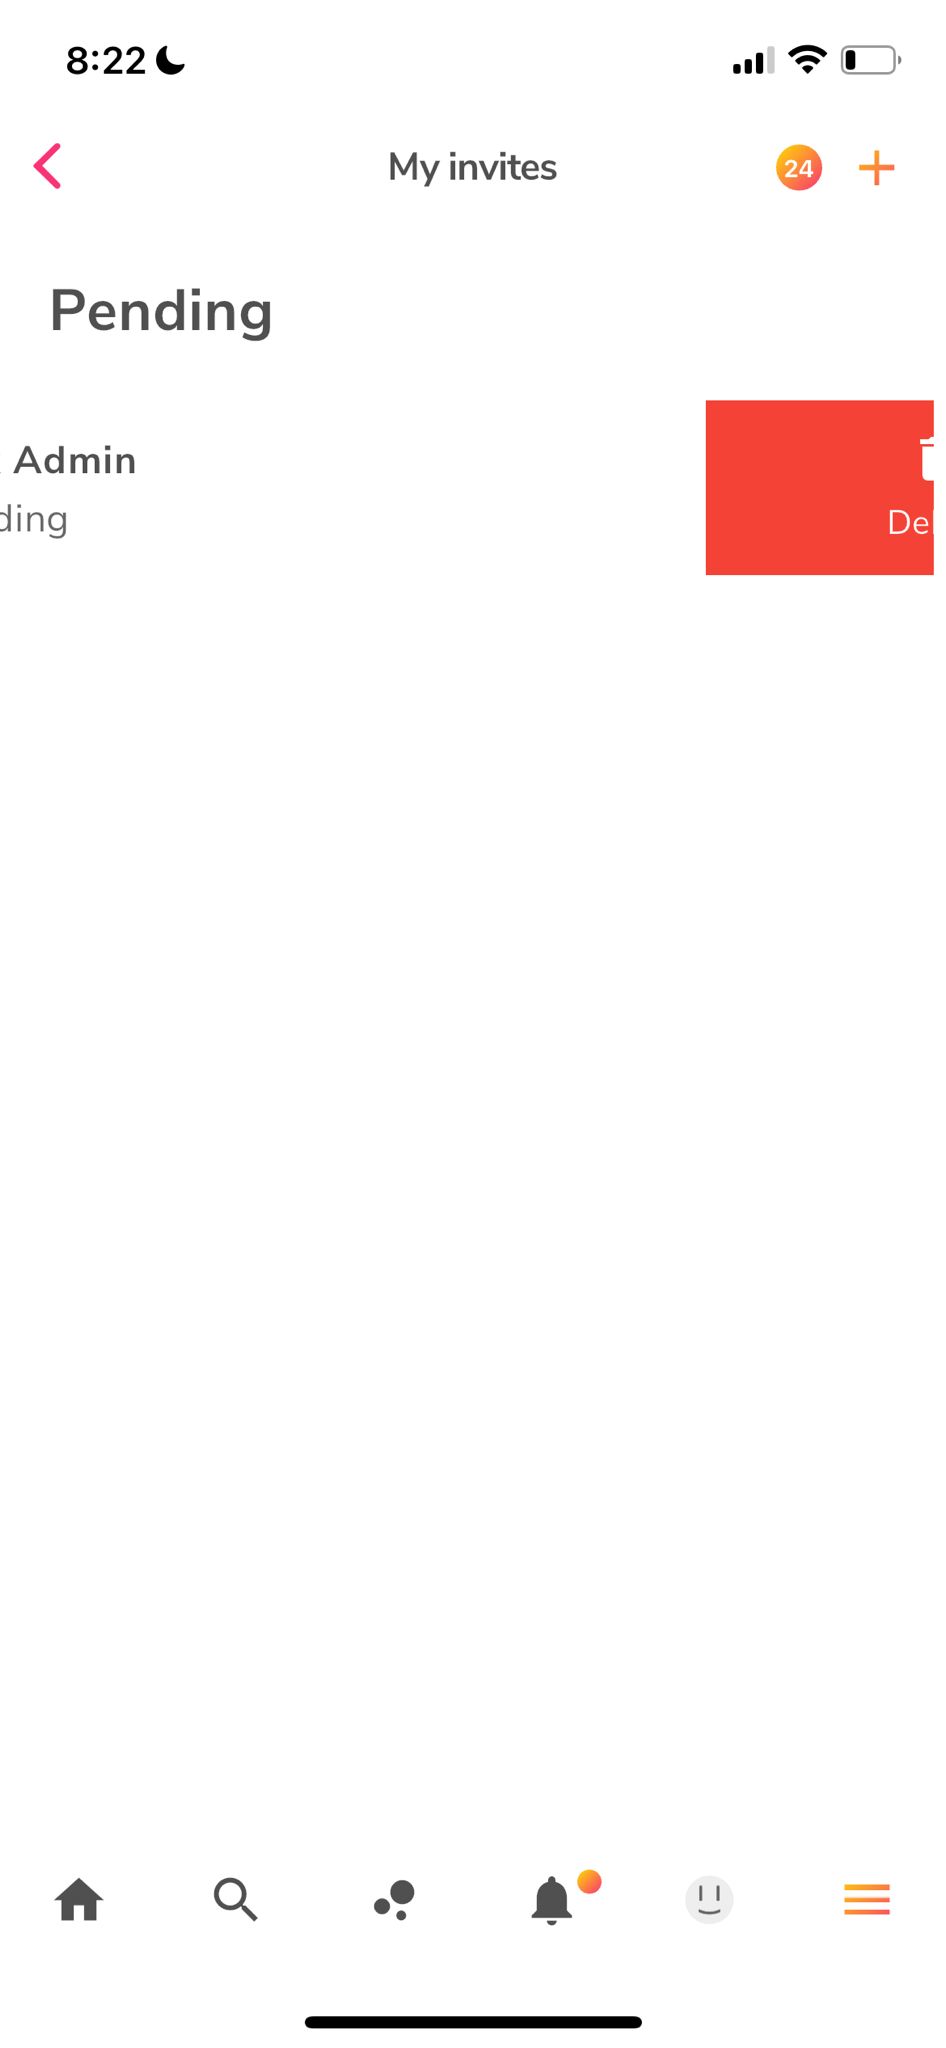
My Invites Area - Delete
Once you have created an invite, you will see it displayed in the My Invites area.
- Here you can track whether the person you invited has signed up or not. As you can see in the image, the invite we create shows up under "Pending"
- If you swipe to the left on the invite, a "delete" option will appear. This allows you to delete the invite if it is no longer required or if you want to resend another email then you'll have to delete the invite and start again.